
AMP MATE MODIFICATION
Instructions on how to install the switch mod which prevents cases from being stuck in the stuck in the annealing cycle.
Matt Findlay - 27/11/2018
After releasing AMP MATE it was discovered it was possible for cases which were not ejected from the shell holder to remain there and be inserted into the annealer to be annealed multiple times.
This modification adds a micro switch to the eject servo which detects a successful 'full' motion of travel on the servo arm each time the eject servo is activated. If the switch is not hit during an eject cycle the unit will pause allowing the user to remove the case before continuing with the cycle.
CAUTION: CASES WILL BE HOT!!!
We have found the best way to remove stuck cases is to move the eject servo arm against the stuck case and gently move the shell holder forward and back by rocking the white geared levers. In extreme cases you can use some pliers.
Instructions:
STEP 1:
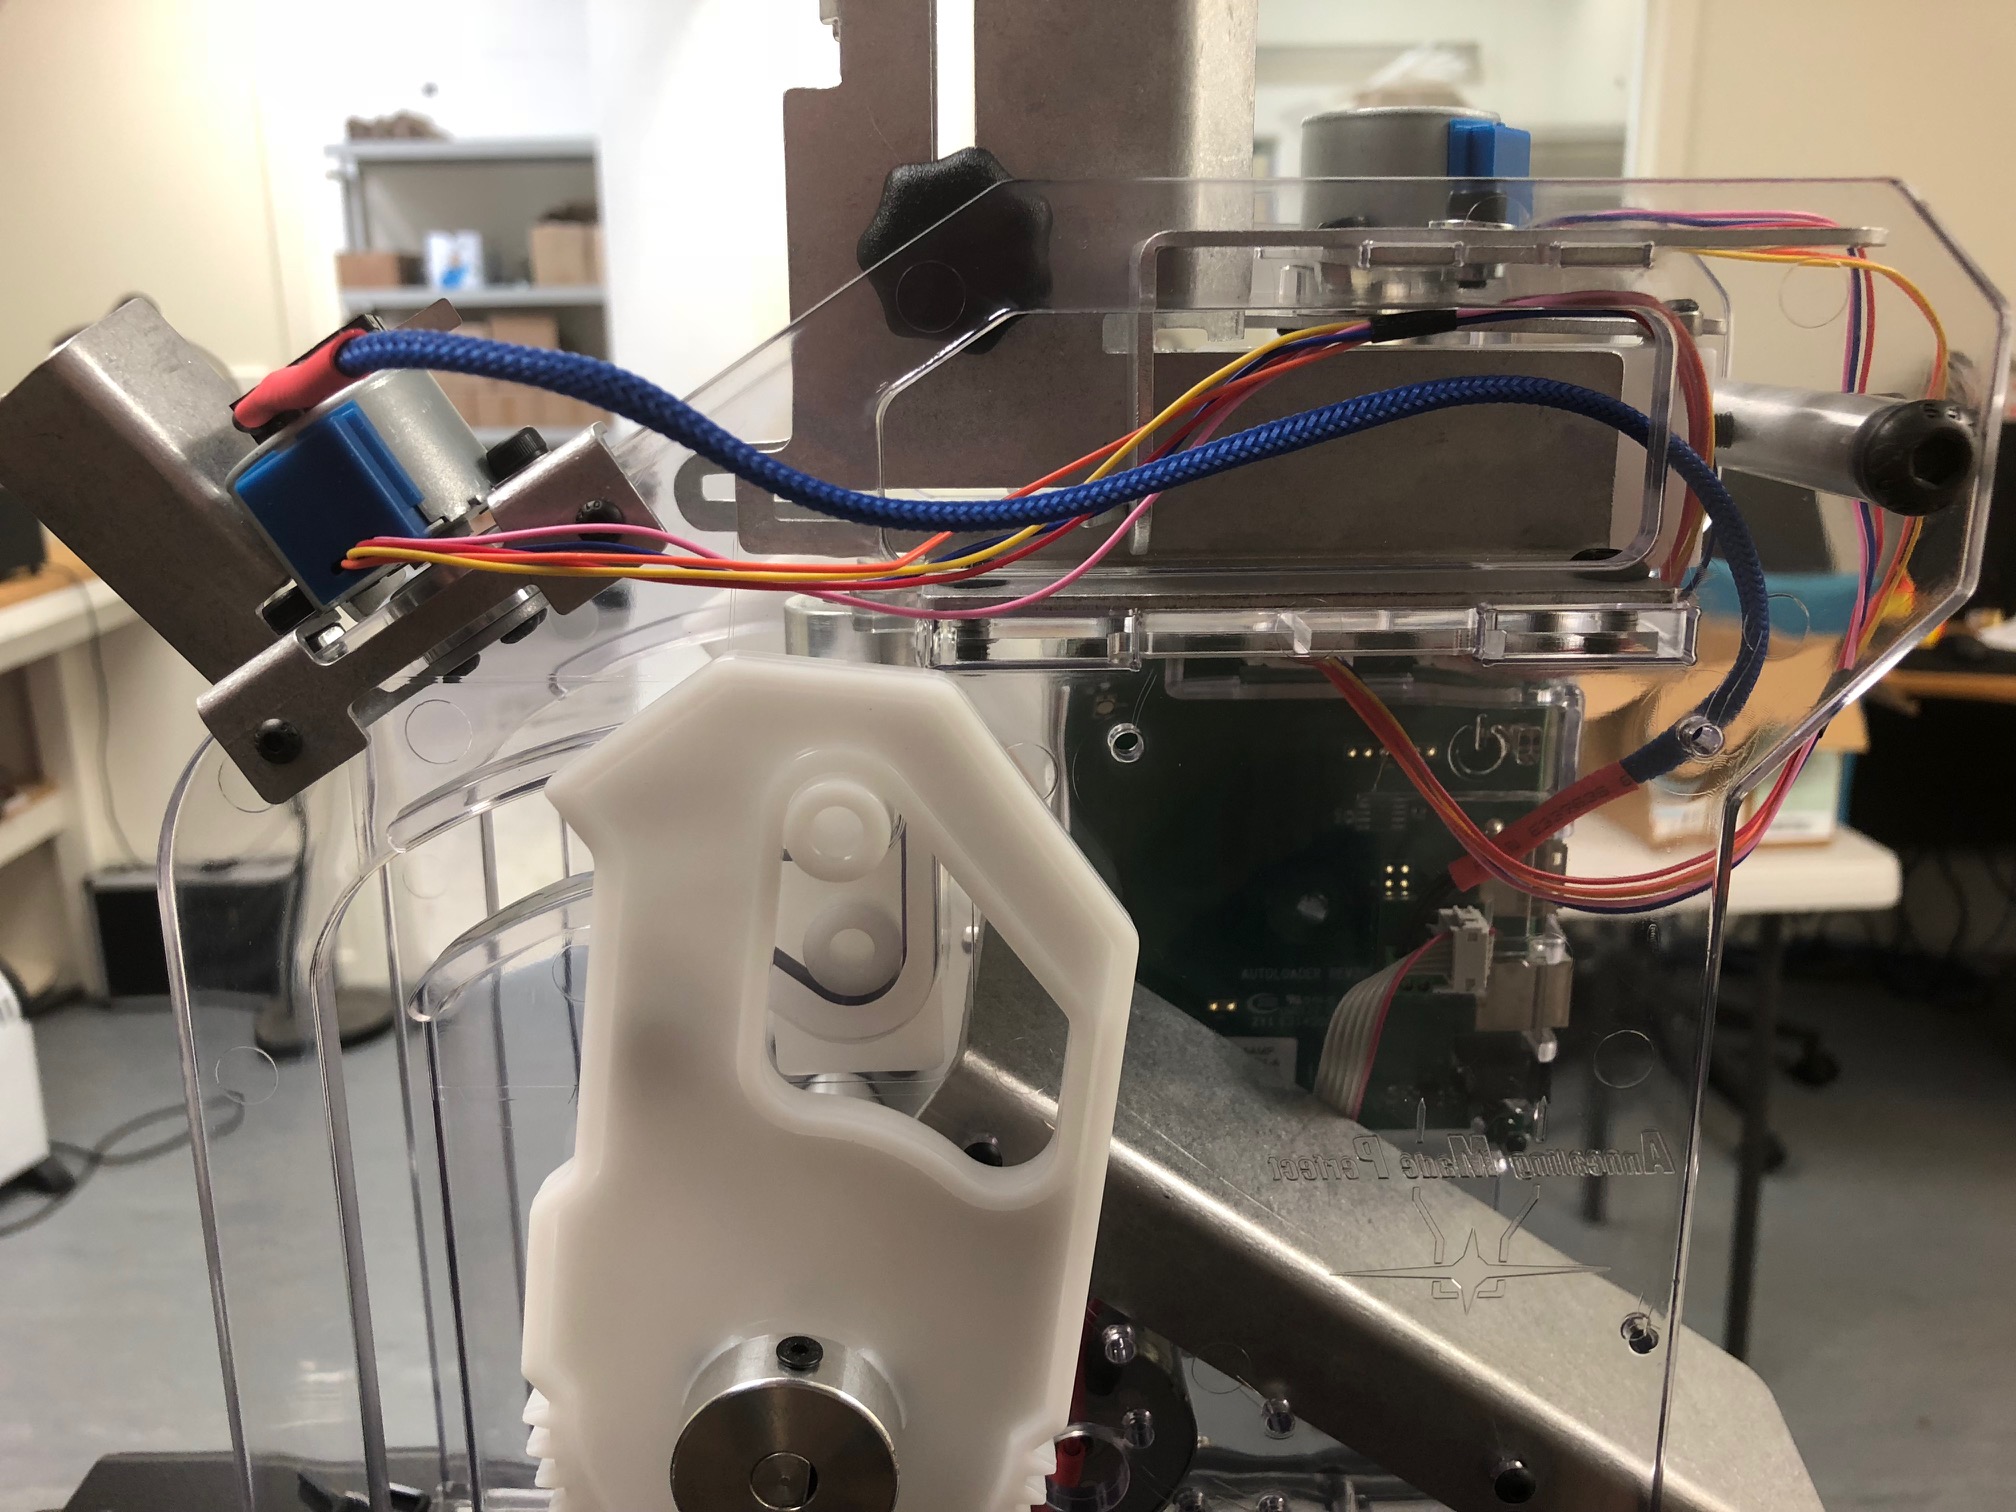
Ensure the AMP MATE and annealer are both turned off and then gently move the eject servo arm fully closed until it wont move any more as shown below.
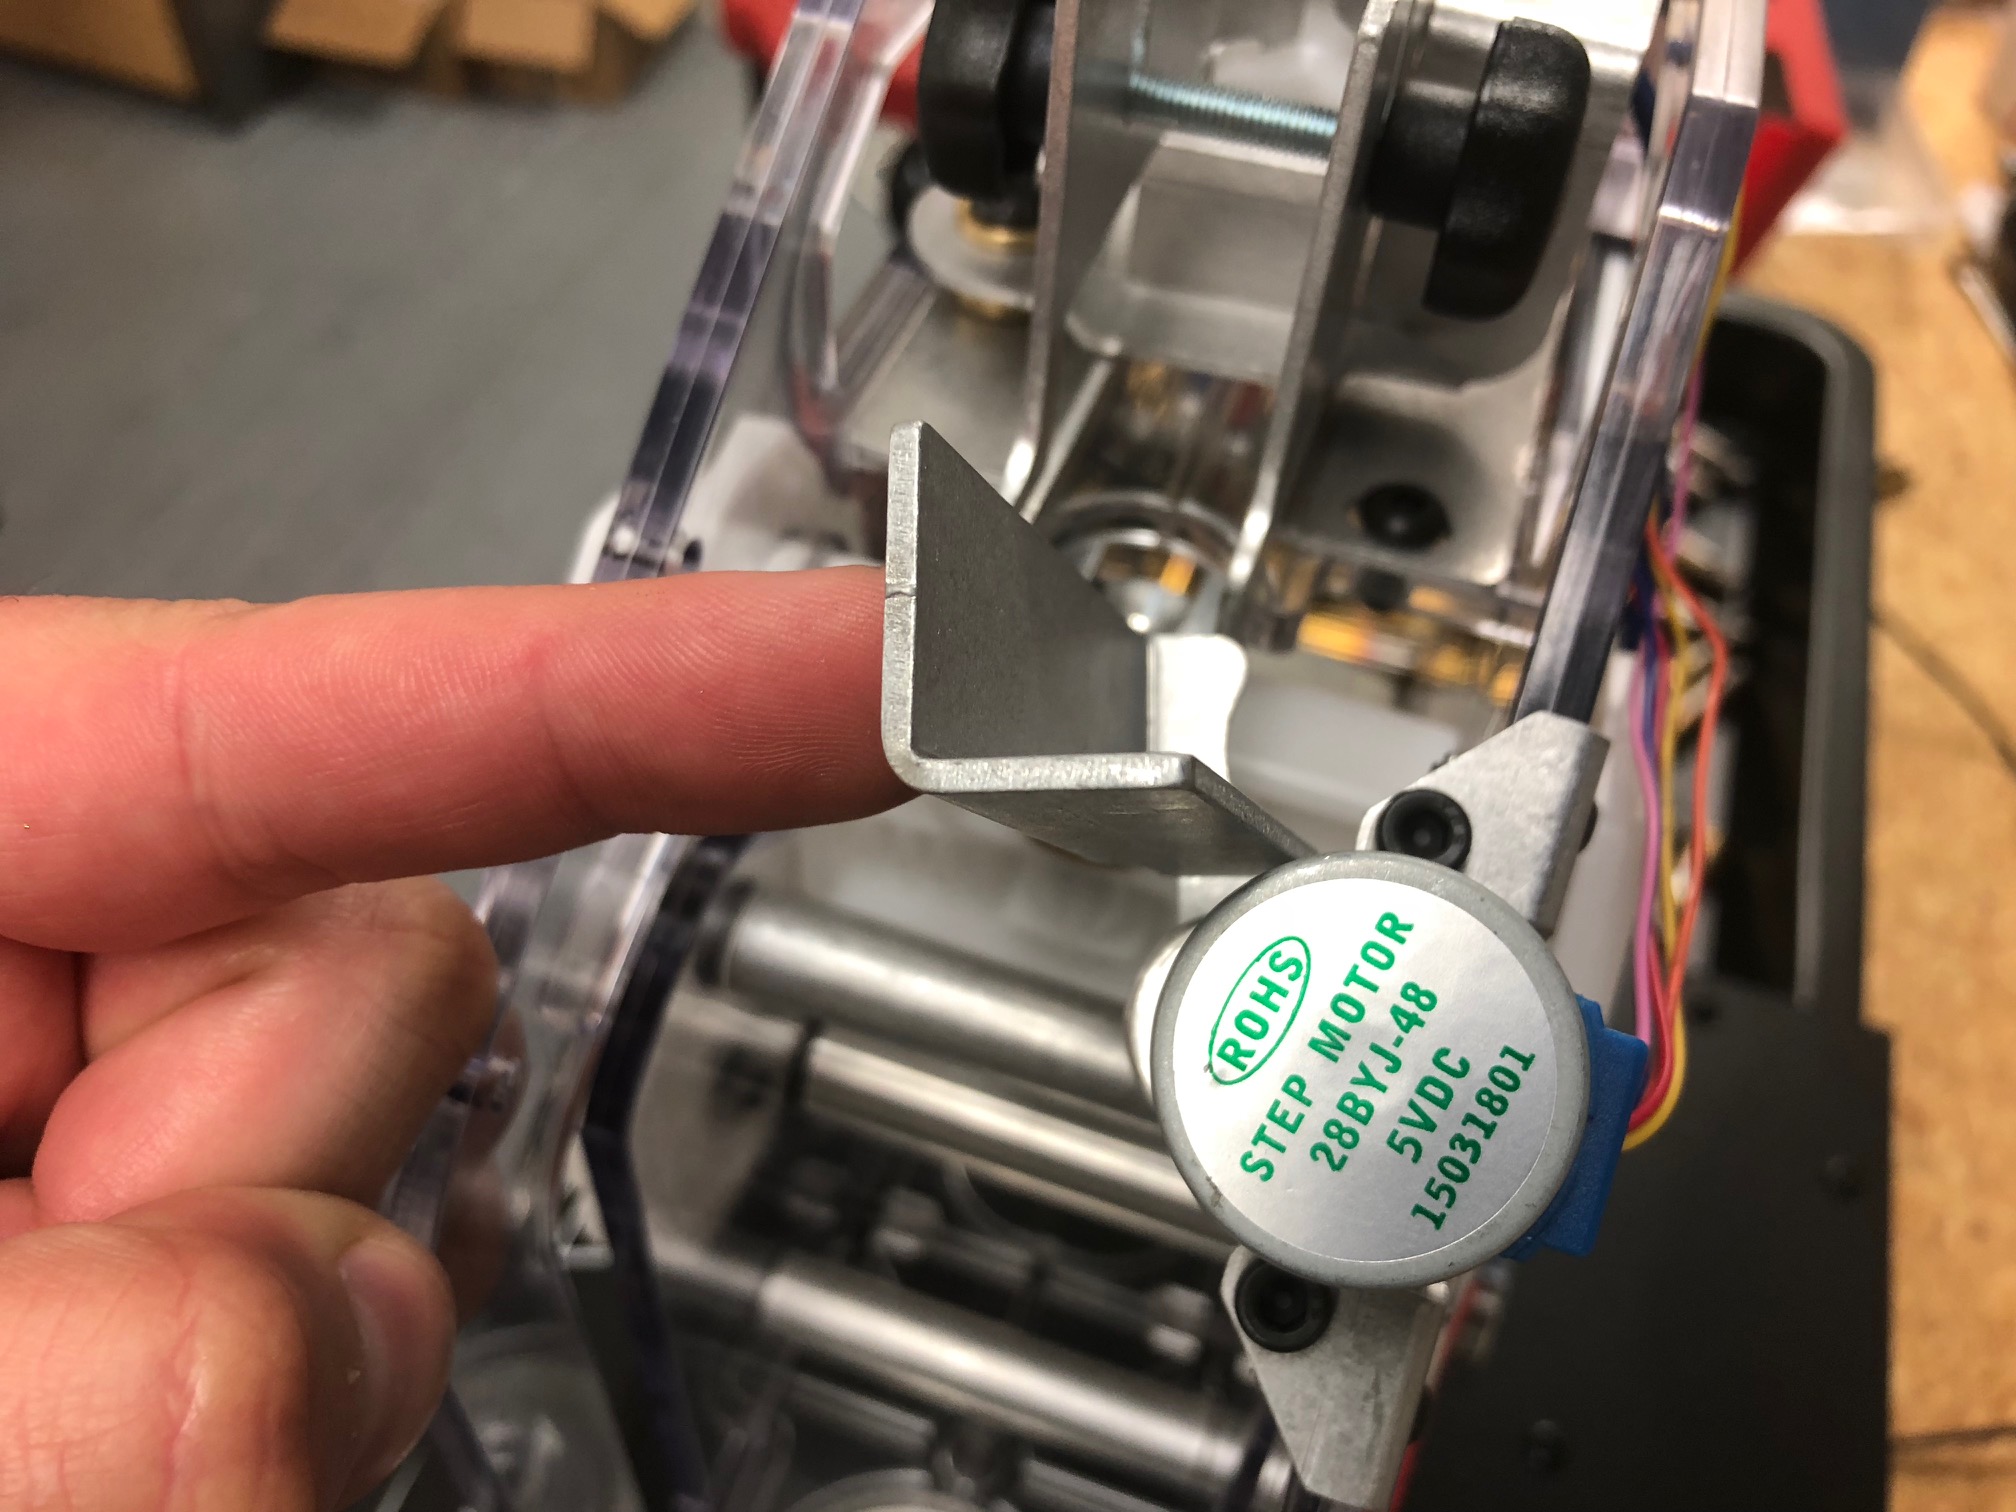
STEP 2:
Experiment with where the best position for the switch is before removing the protective cover on the double sided tape.
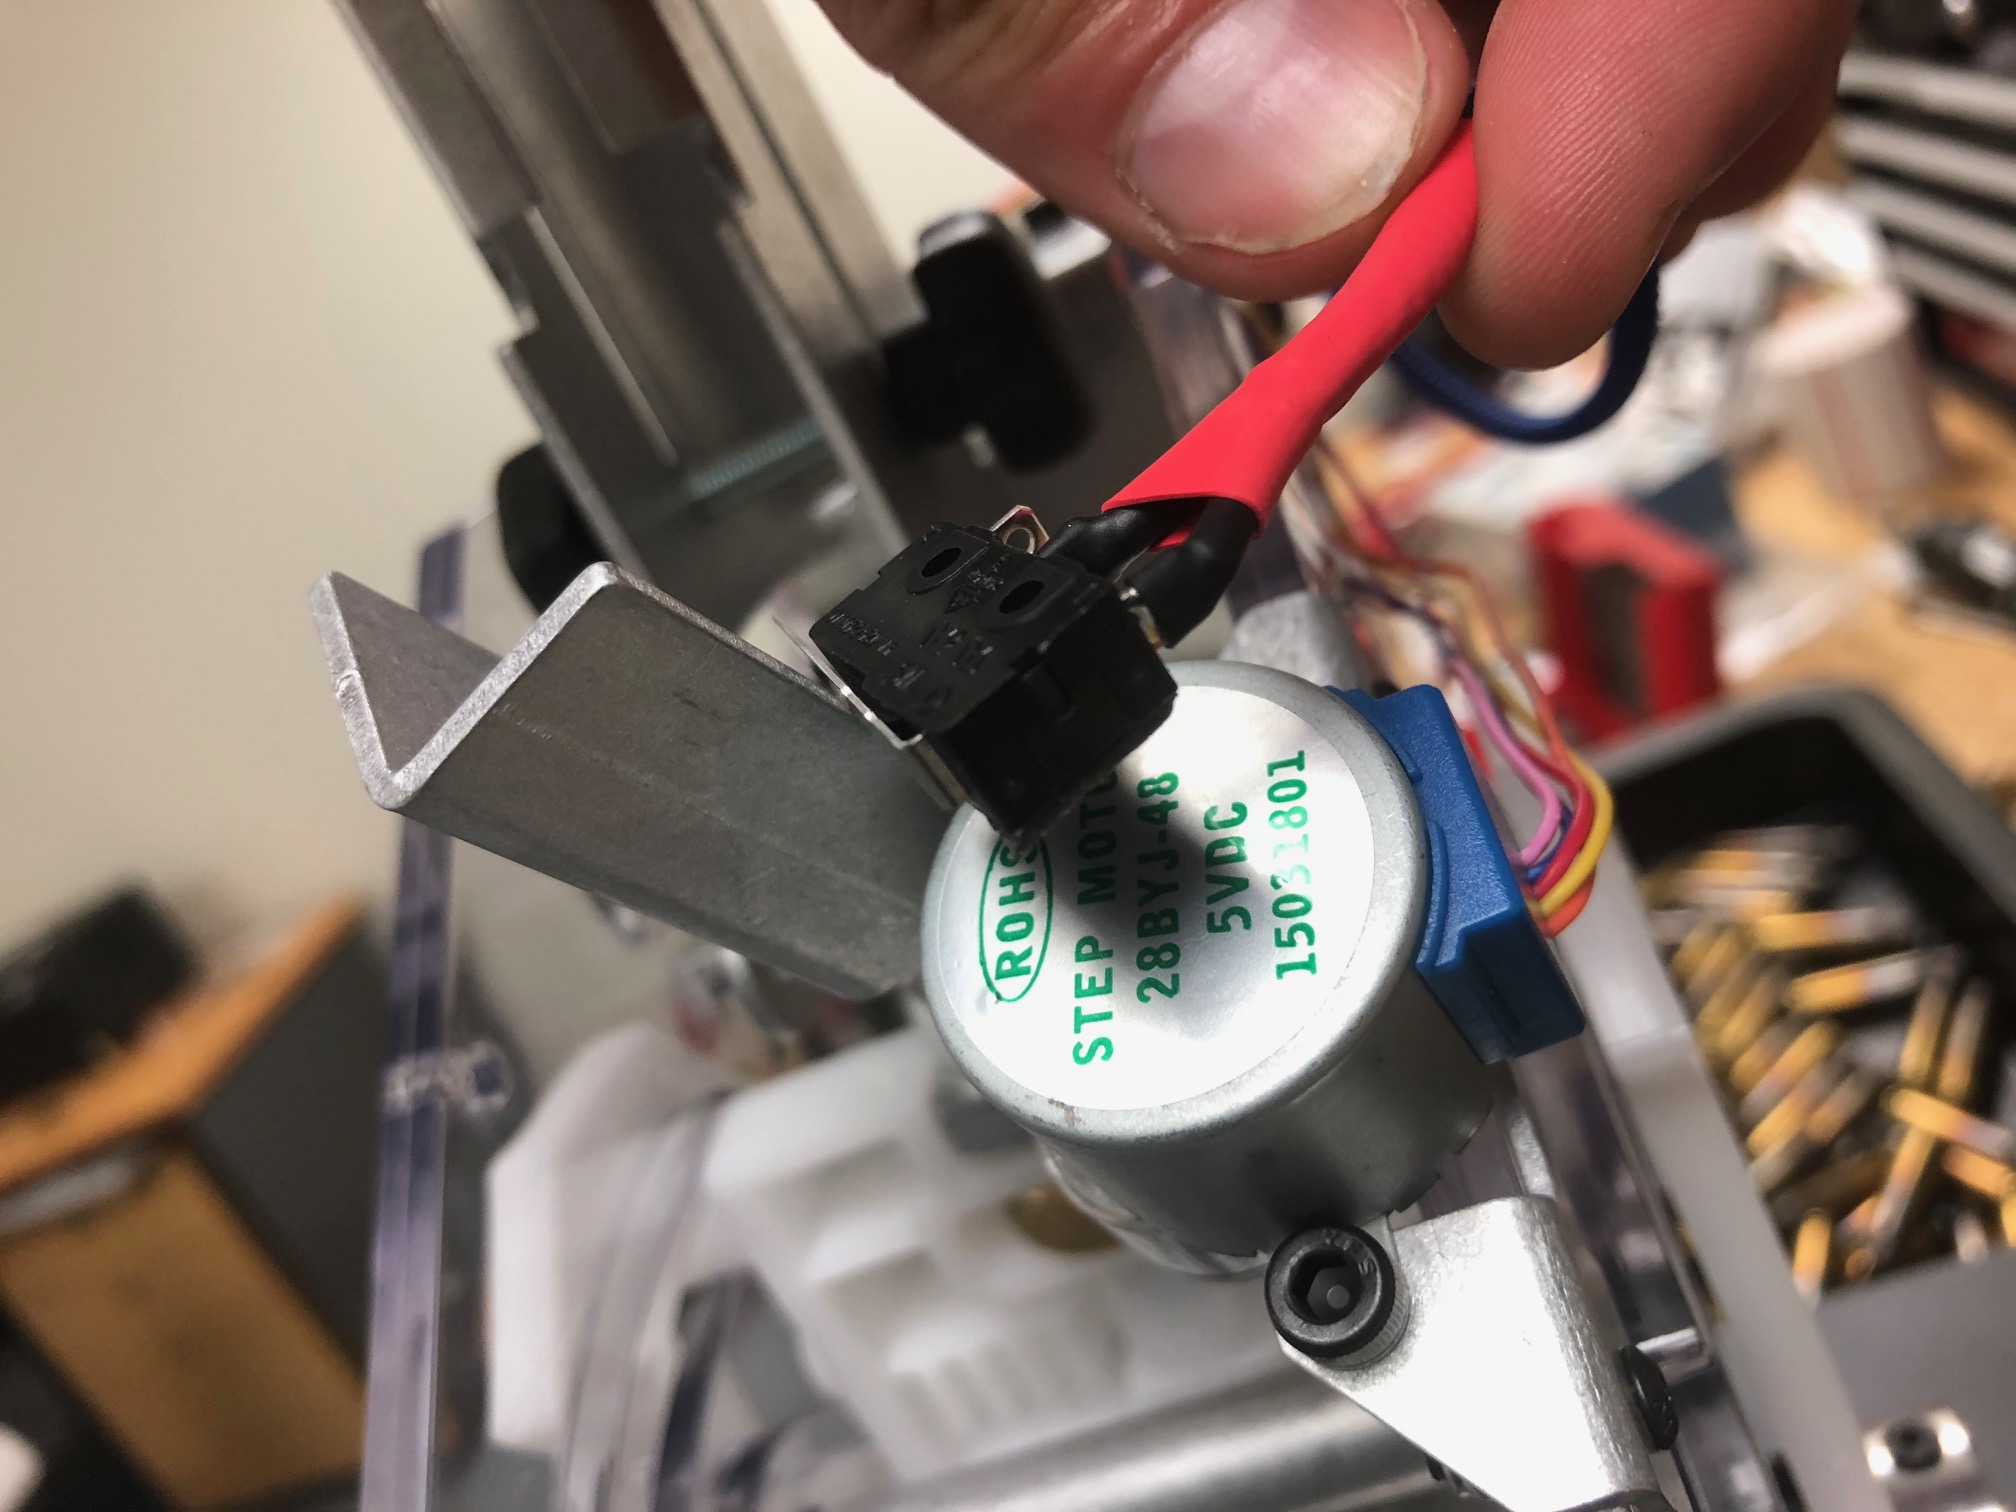
As successful install requires the switch to be fully closed when the eject arm is fully closed and that the lever on the switch does not interfere with cases when they move from the loaded position to the anneal position.
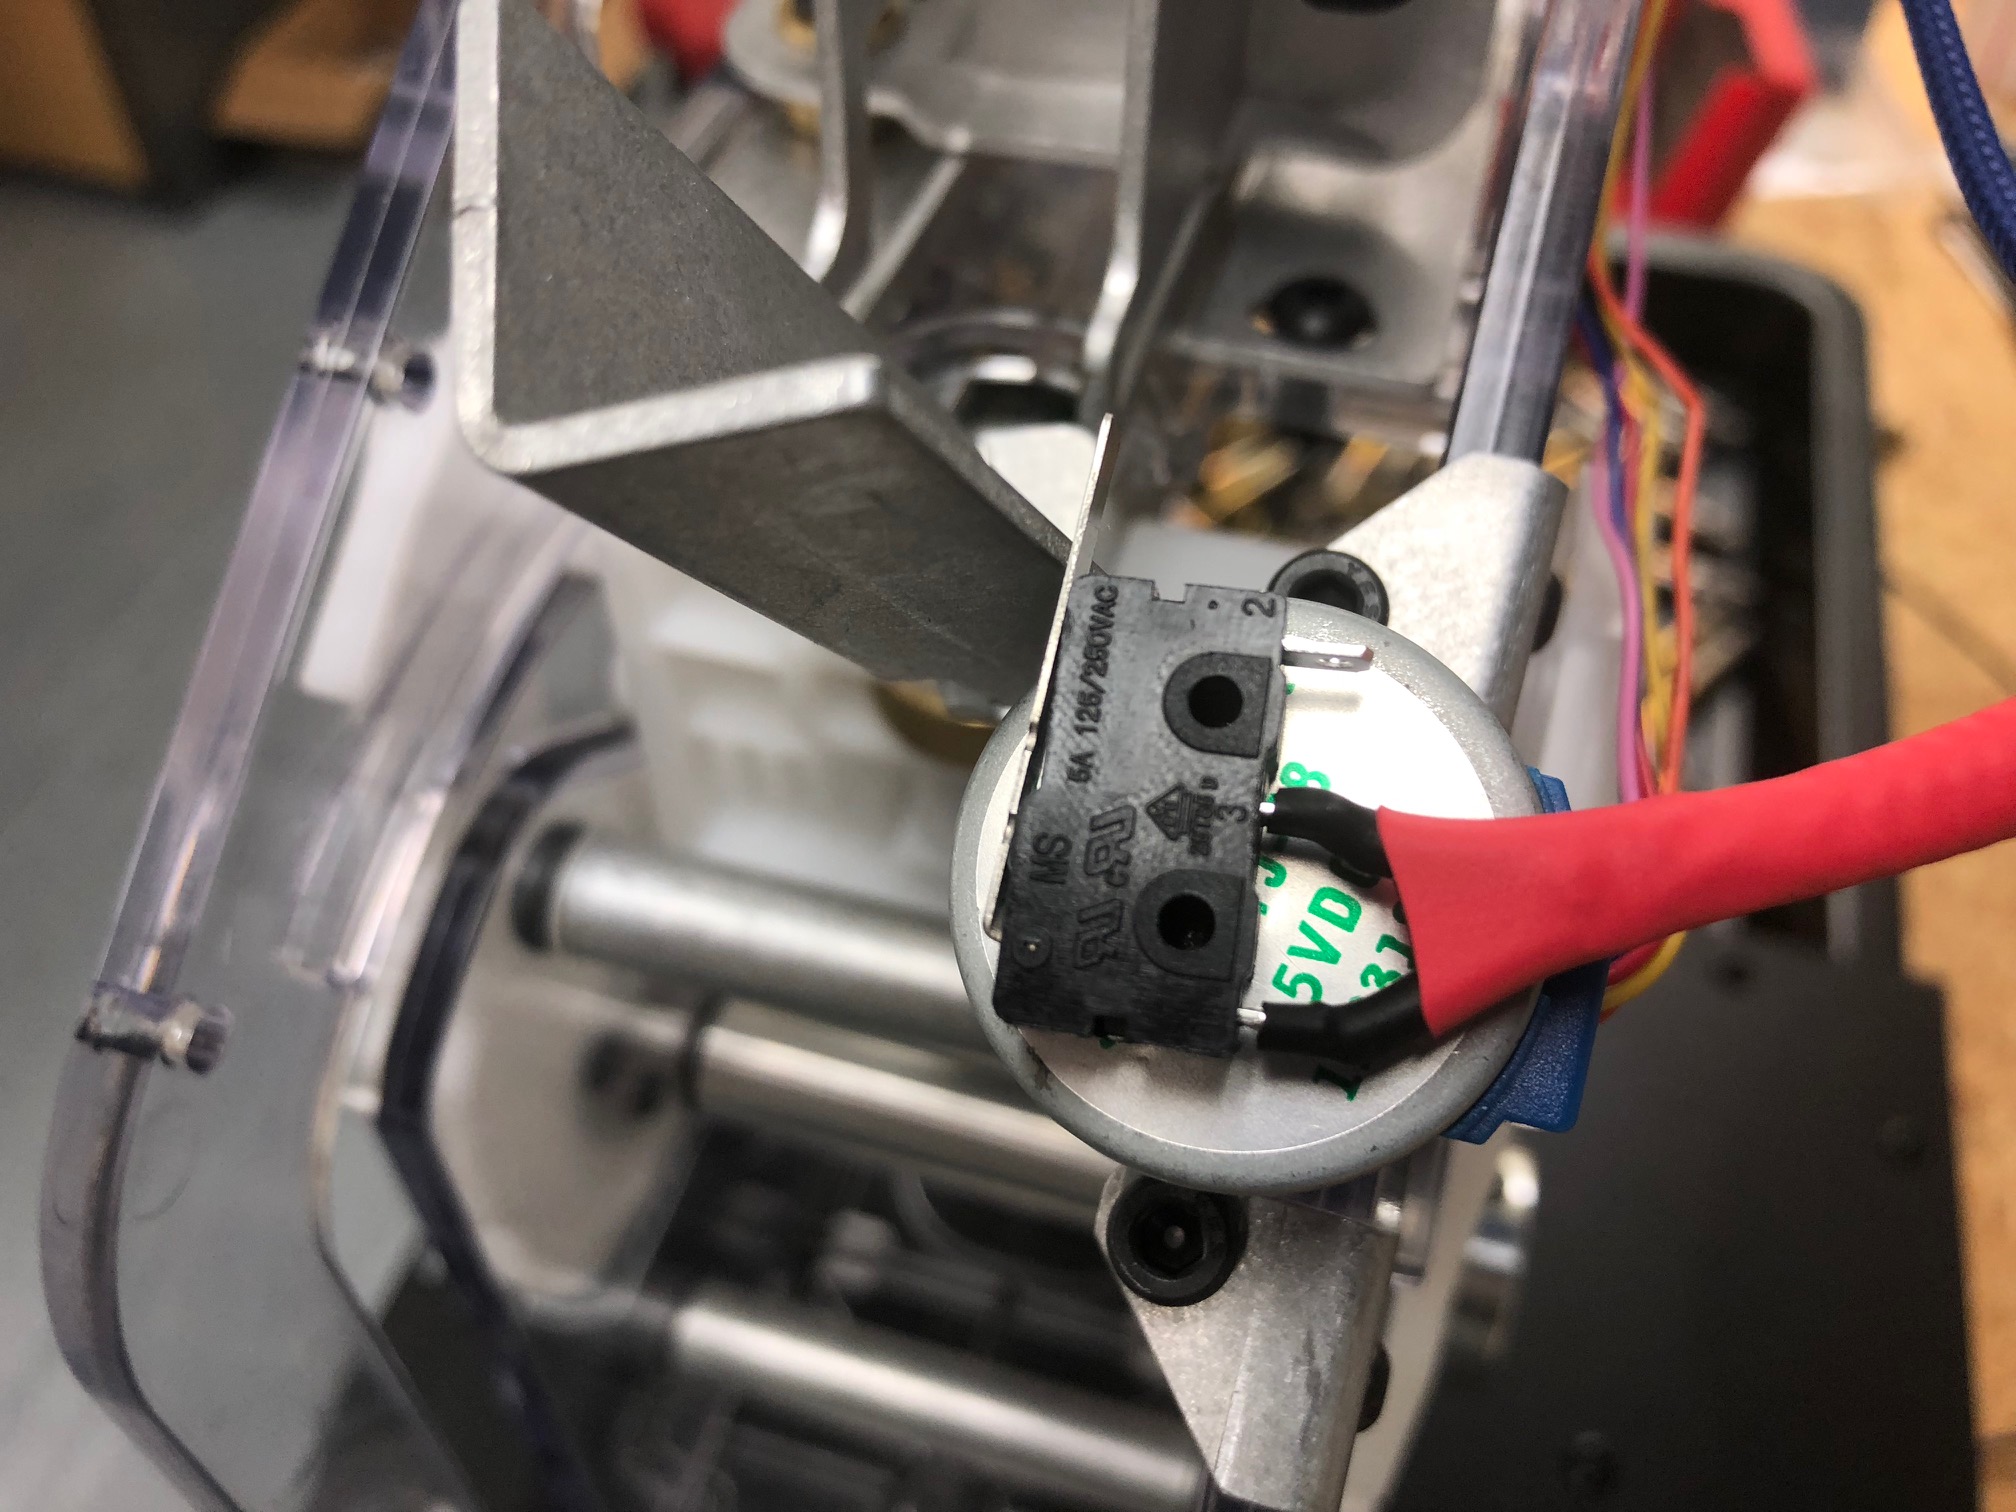
We find the best position is to have the corner of the switch where the steel lever attaches to be as close to but not hanging over the edge of the servo housing as shown below.
Remove the red cover from the double sided tape on the switch (using tweezers helps with this). After ensuring the servo arm is fully closed as shown, while pressing the switch fully closed press it firmly down onto the top of the servo. as shown below.
STEP 3:
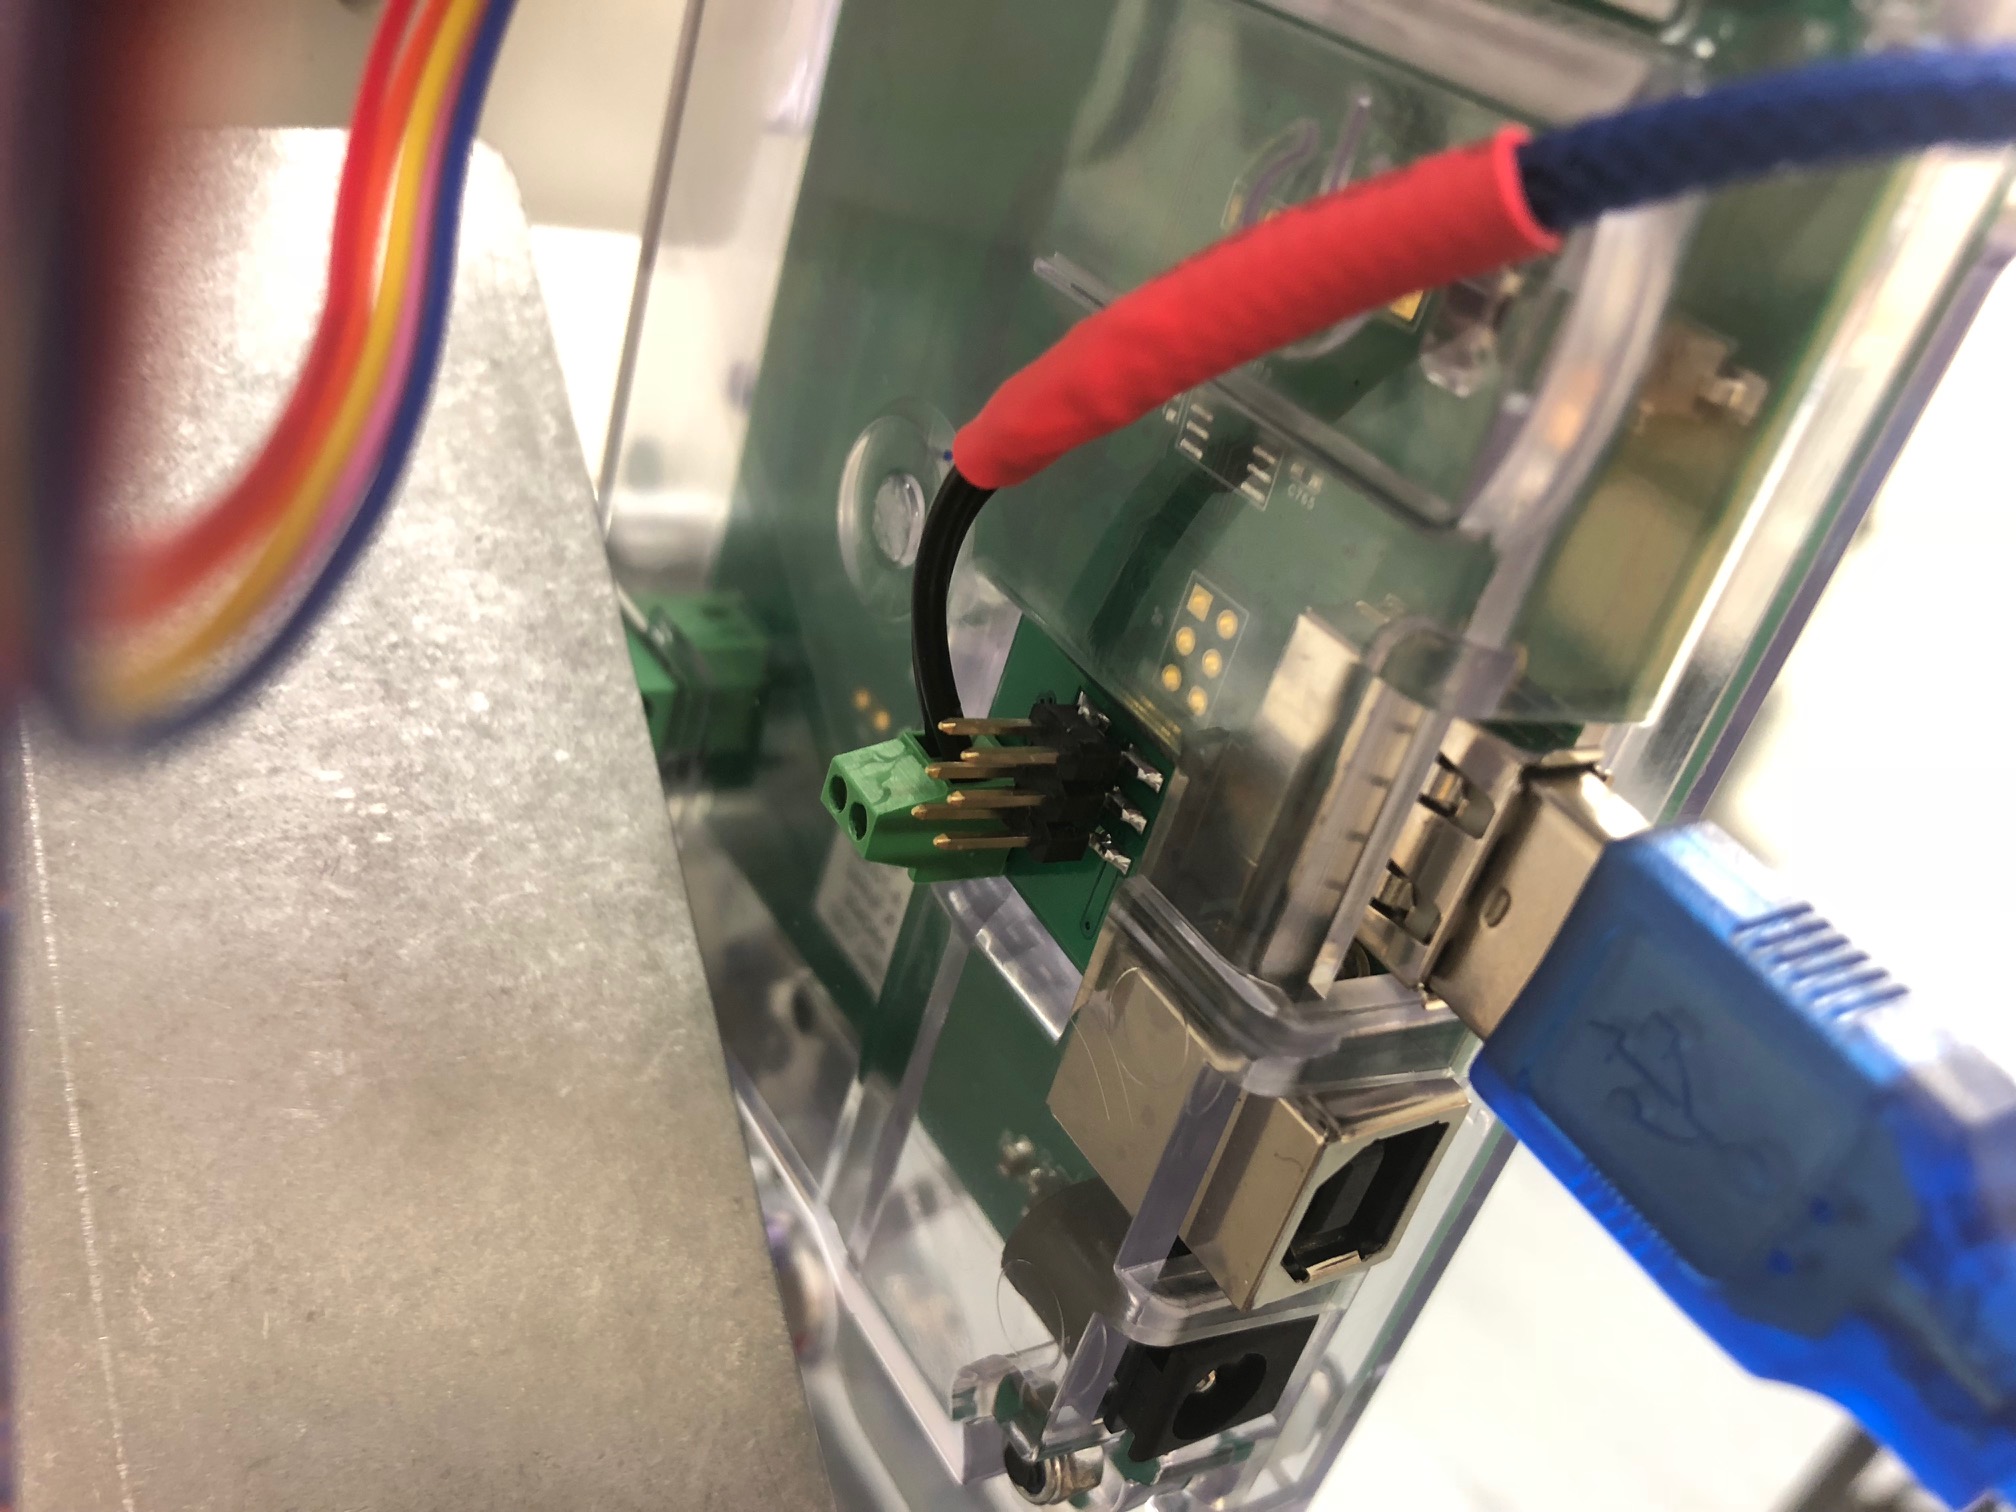
Gently remove the sensor ribbon and plug from its socket as shown below.
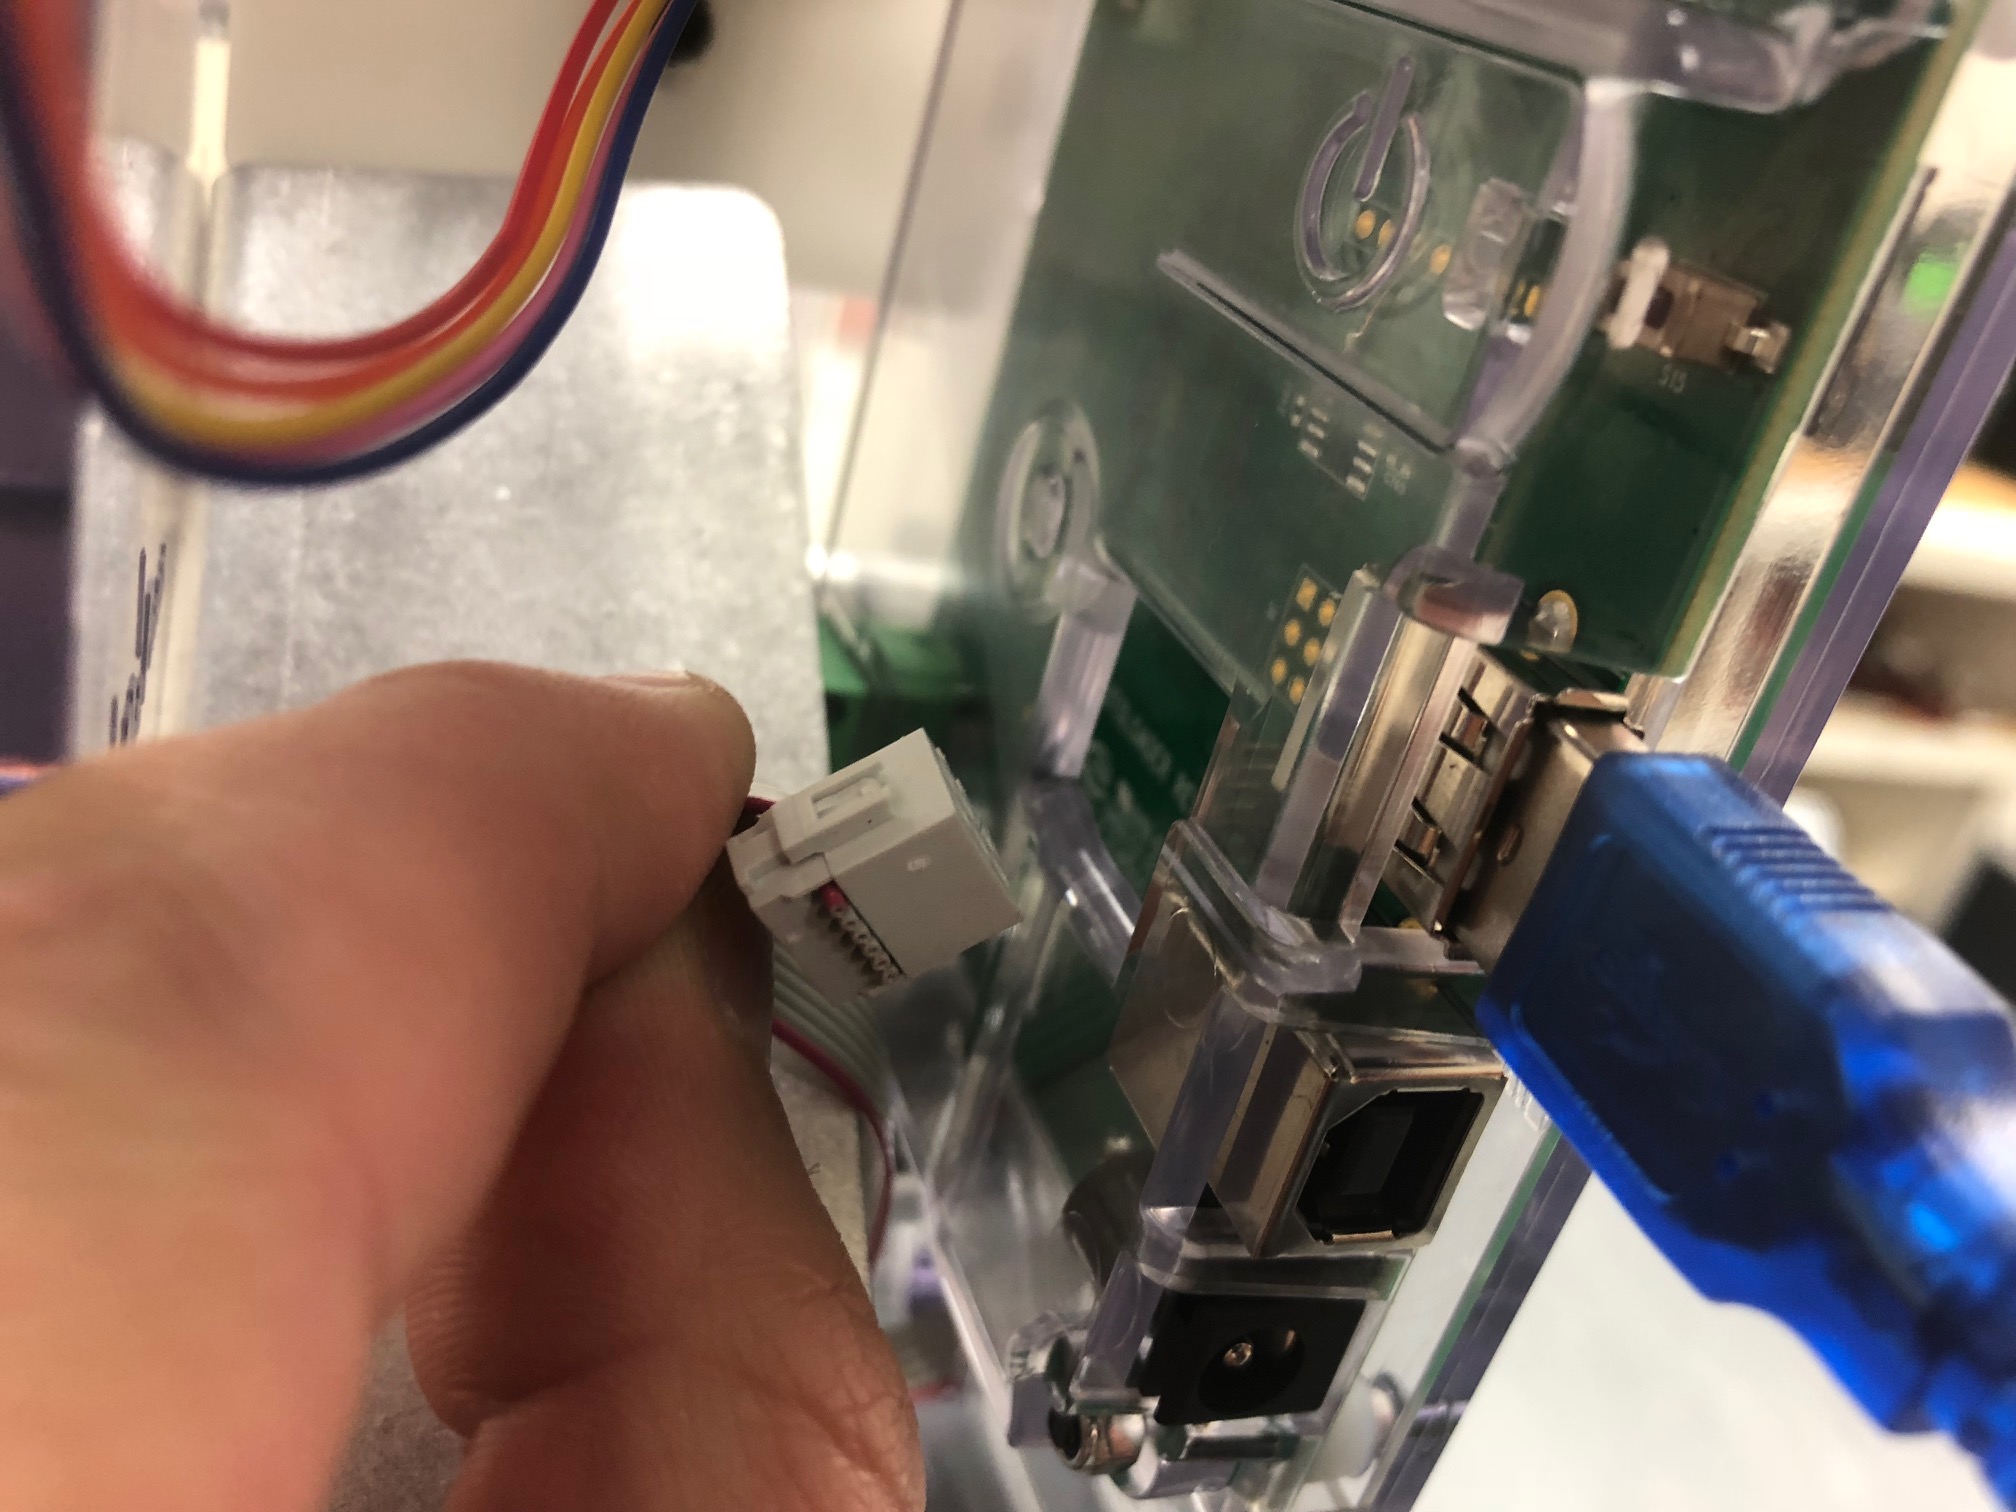
Feed the cable and its circuit board plug carefully through the gap in the clear side wall and then to the circuit board as shown above.
Plug the small circuit board into the space provided where the sensor plug was previously.
NOTE: Take great care that it is plugged in correctly. There are 6 pins on the terminal which must line up with the plug and it is possible to plug it in and miss align it. You wont damage the unit by doing so but the sensor and mod will not work unless plugged in correctly. If you find that the sensor is no longer working check this connection.
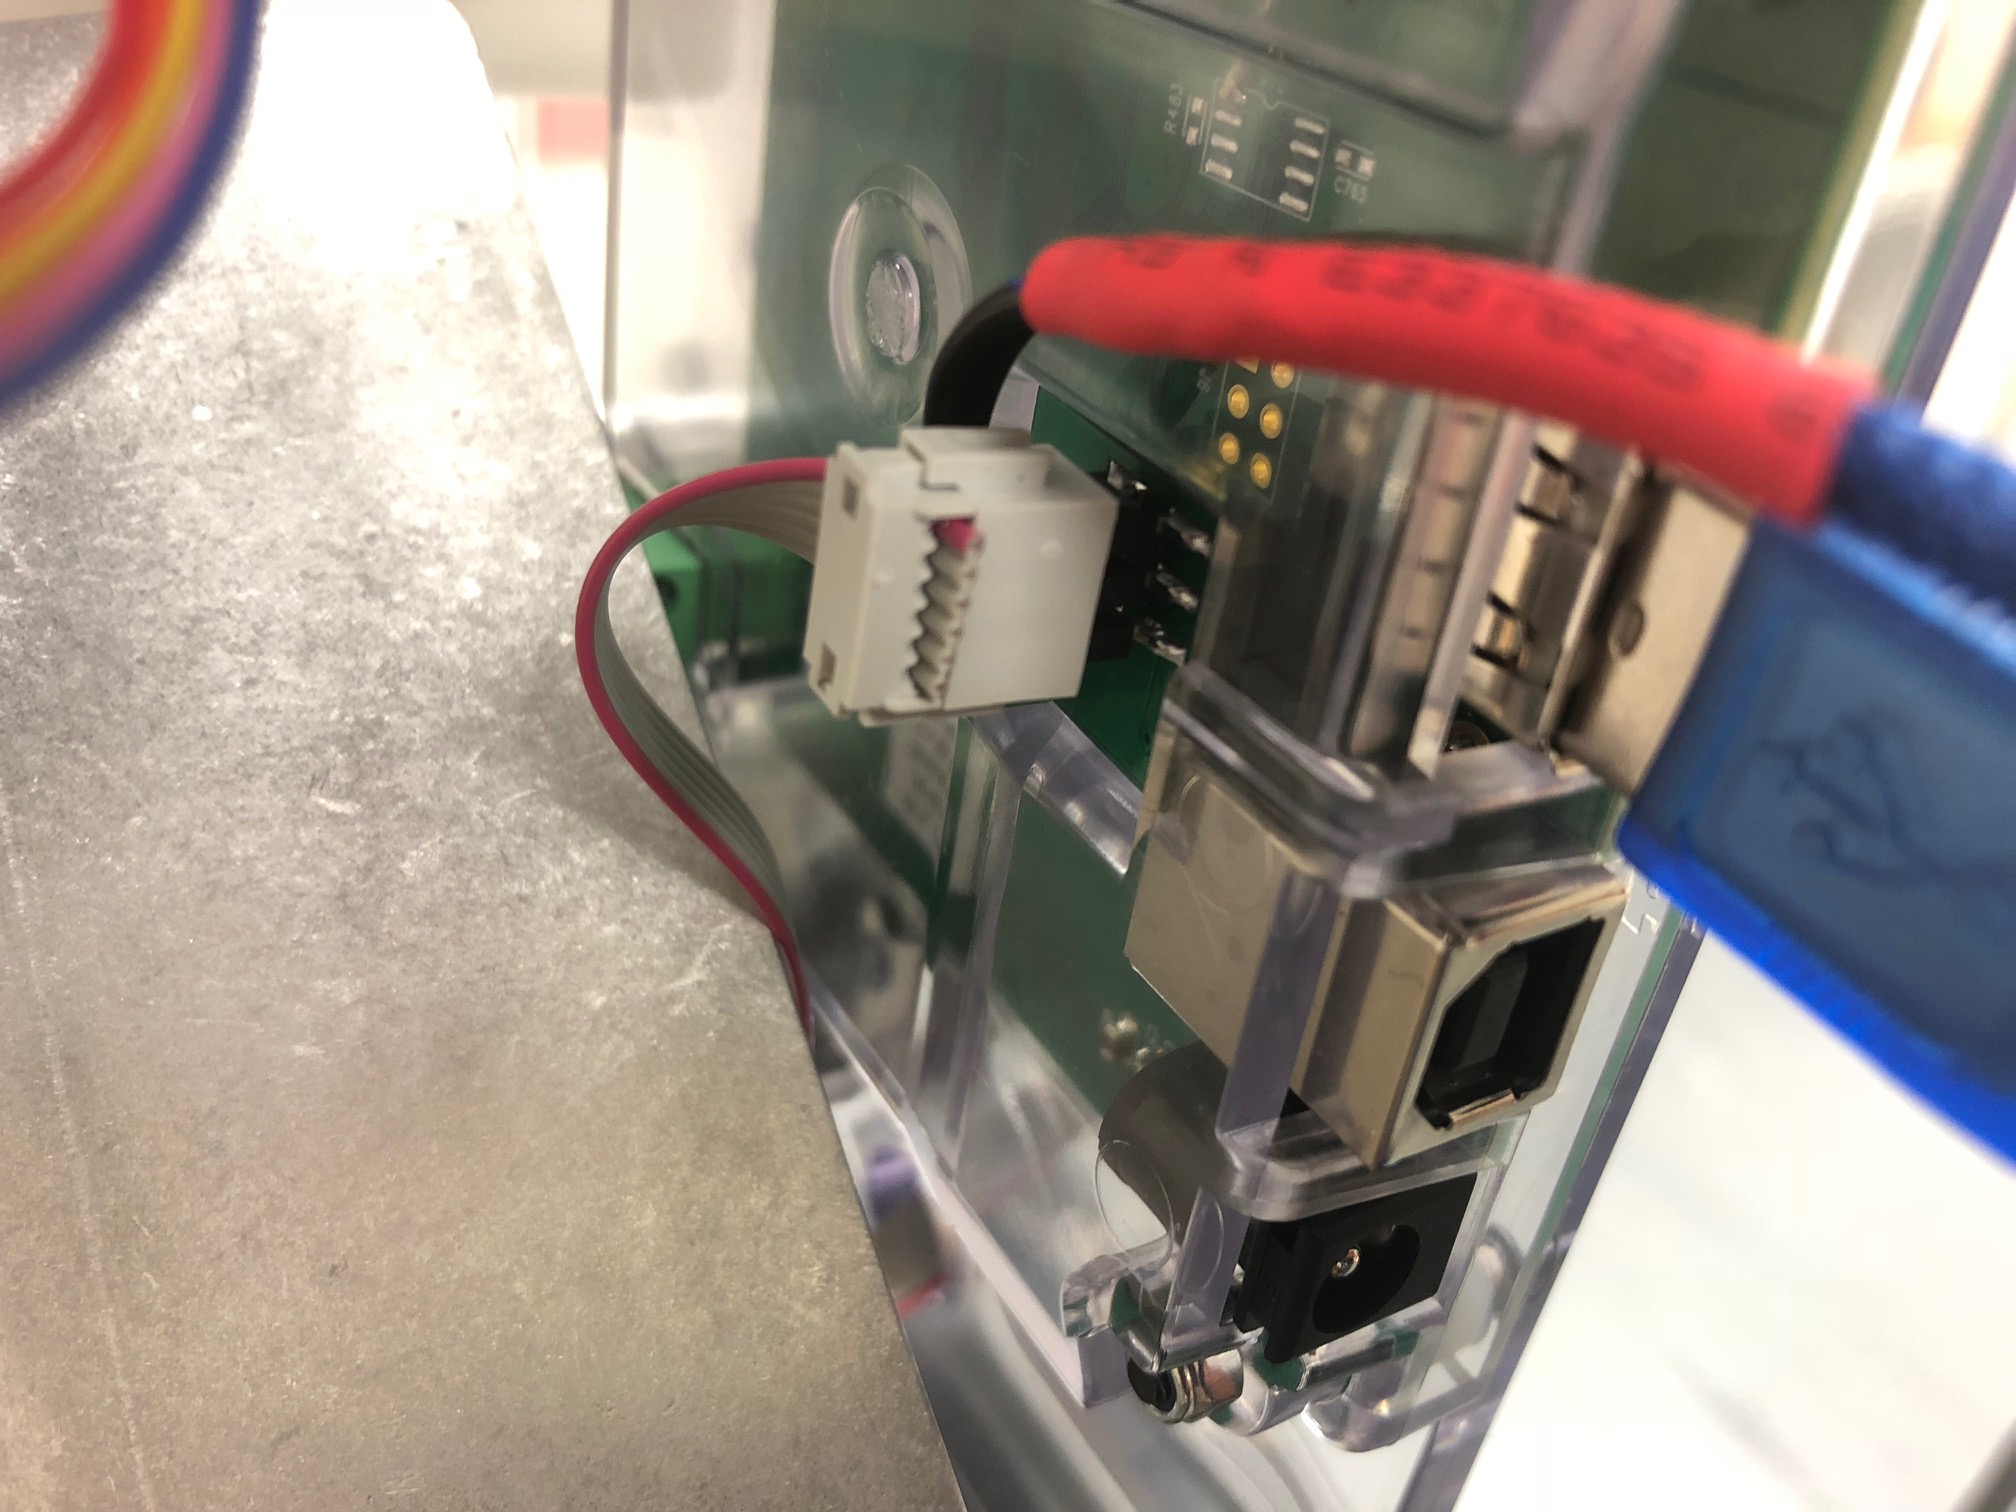
Once the small circuit board is correctly plugged in you can re install the sensor plug. Again please check that it is installed correctly as shown below.
STEP 4:
Download and install this software: (Placeholder until release)
STEP 5:
Test the operation of the switch by deliberately holding the eject servo arm back when it attempts to operate. If the mod has been installed correctly the unit will stop once it fails to detect a successful eject.