EXTREME WILDCATTING
With Annealing Made Perfect
Alex Findlay - 4/07/2019
Copyright AMP ANNEALING 2019
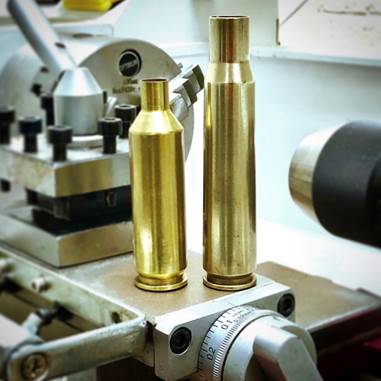
Forming 375 Hammer Head cases from 50 BMG parent cases
See the video!
Wildcatting can include:
·
simply fireforming standard cases in an "improved” chamber, e.g. Ackley Improved cartridges.
·
necking standard cases up or down from a parent case, e.g. 270W, 30.06. 35 Whelan.
·
shortening and necking cases up or down to form a whole new cartridge e.g. 300 Blackout (from 223), 416 Barrett (from 50 BMG).
The second and third of these processes work the brass in the necks and shoulders significantly. This can frequently result in cases splitting due to exceeding their elastic limit. The more the brass is worked, the harder it gets, and the more likely it is to split. When cases are being shortened and necked up or down, it is usually necessary to reform in several incremental stages. Each stage further work hardens the brass. It is therefore necessary to anneal the neck and shoulder region of these cases at each stage, both to enable easier reforming, and also to prevent splitting.
One of the most extreme examples of this process is the forming of 375 Hammer Head cases from 50 BMG parent cases. We are aware of a number of similar 50 BMG based wildcat projects. The 375 Hammer Head was designed by Stuart Elliot and Phil Jones in Brisbane, Australia. The targeted performance is to drive a 360 Gr. projectile at in excess of 3,500 FPS. This should go transonic beyond 4,000 meters (2.5 miles). Phil has produced a bushing die which re-forms 50 BMG cases in four stages. He has also produced a Full-Length Sizing die. During development, Phil and Stuart experienced severe difficulty with case splitting. Another problem was the sheer force required to push the brass through the forming die.
The two dies Phil made were sent to us to develop an annealing sequence which would allow accurate and effective forming.
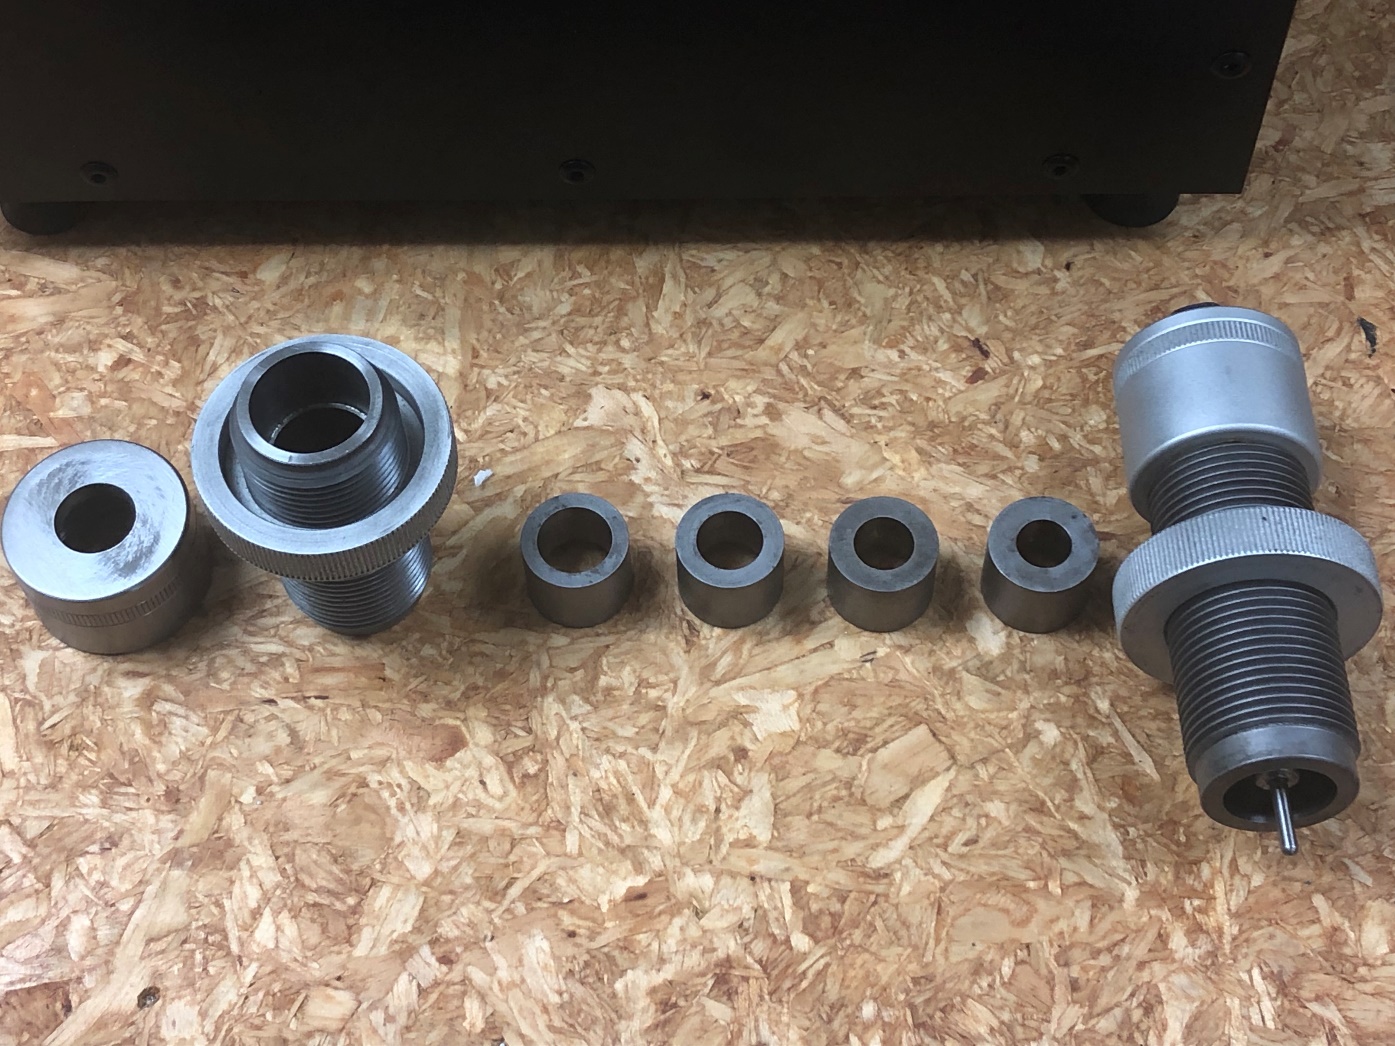
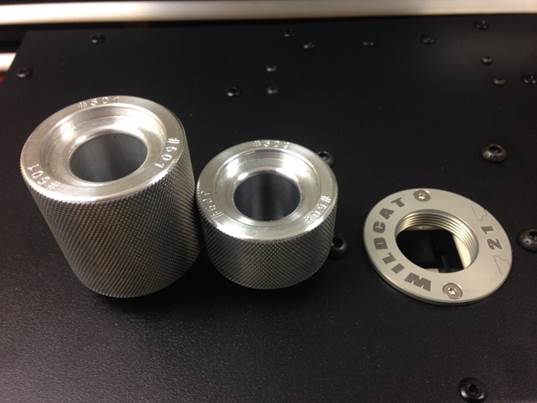
(L – R) Forming die cap – forming die body – 4 bushing inserts – full length sizing die
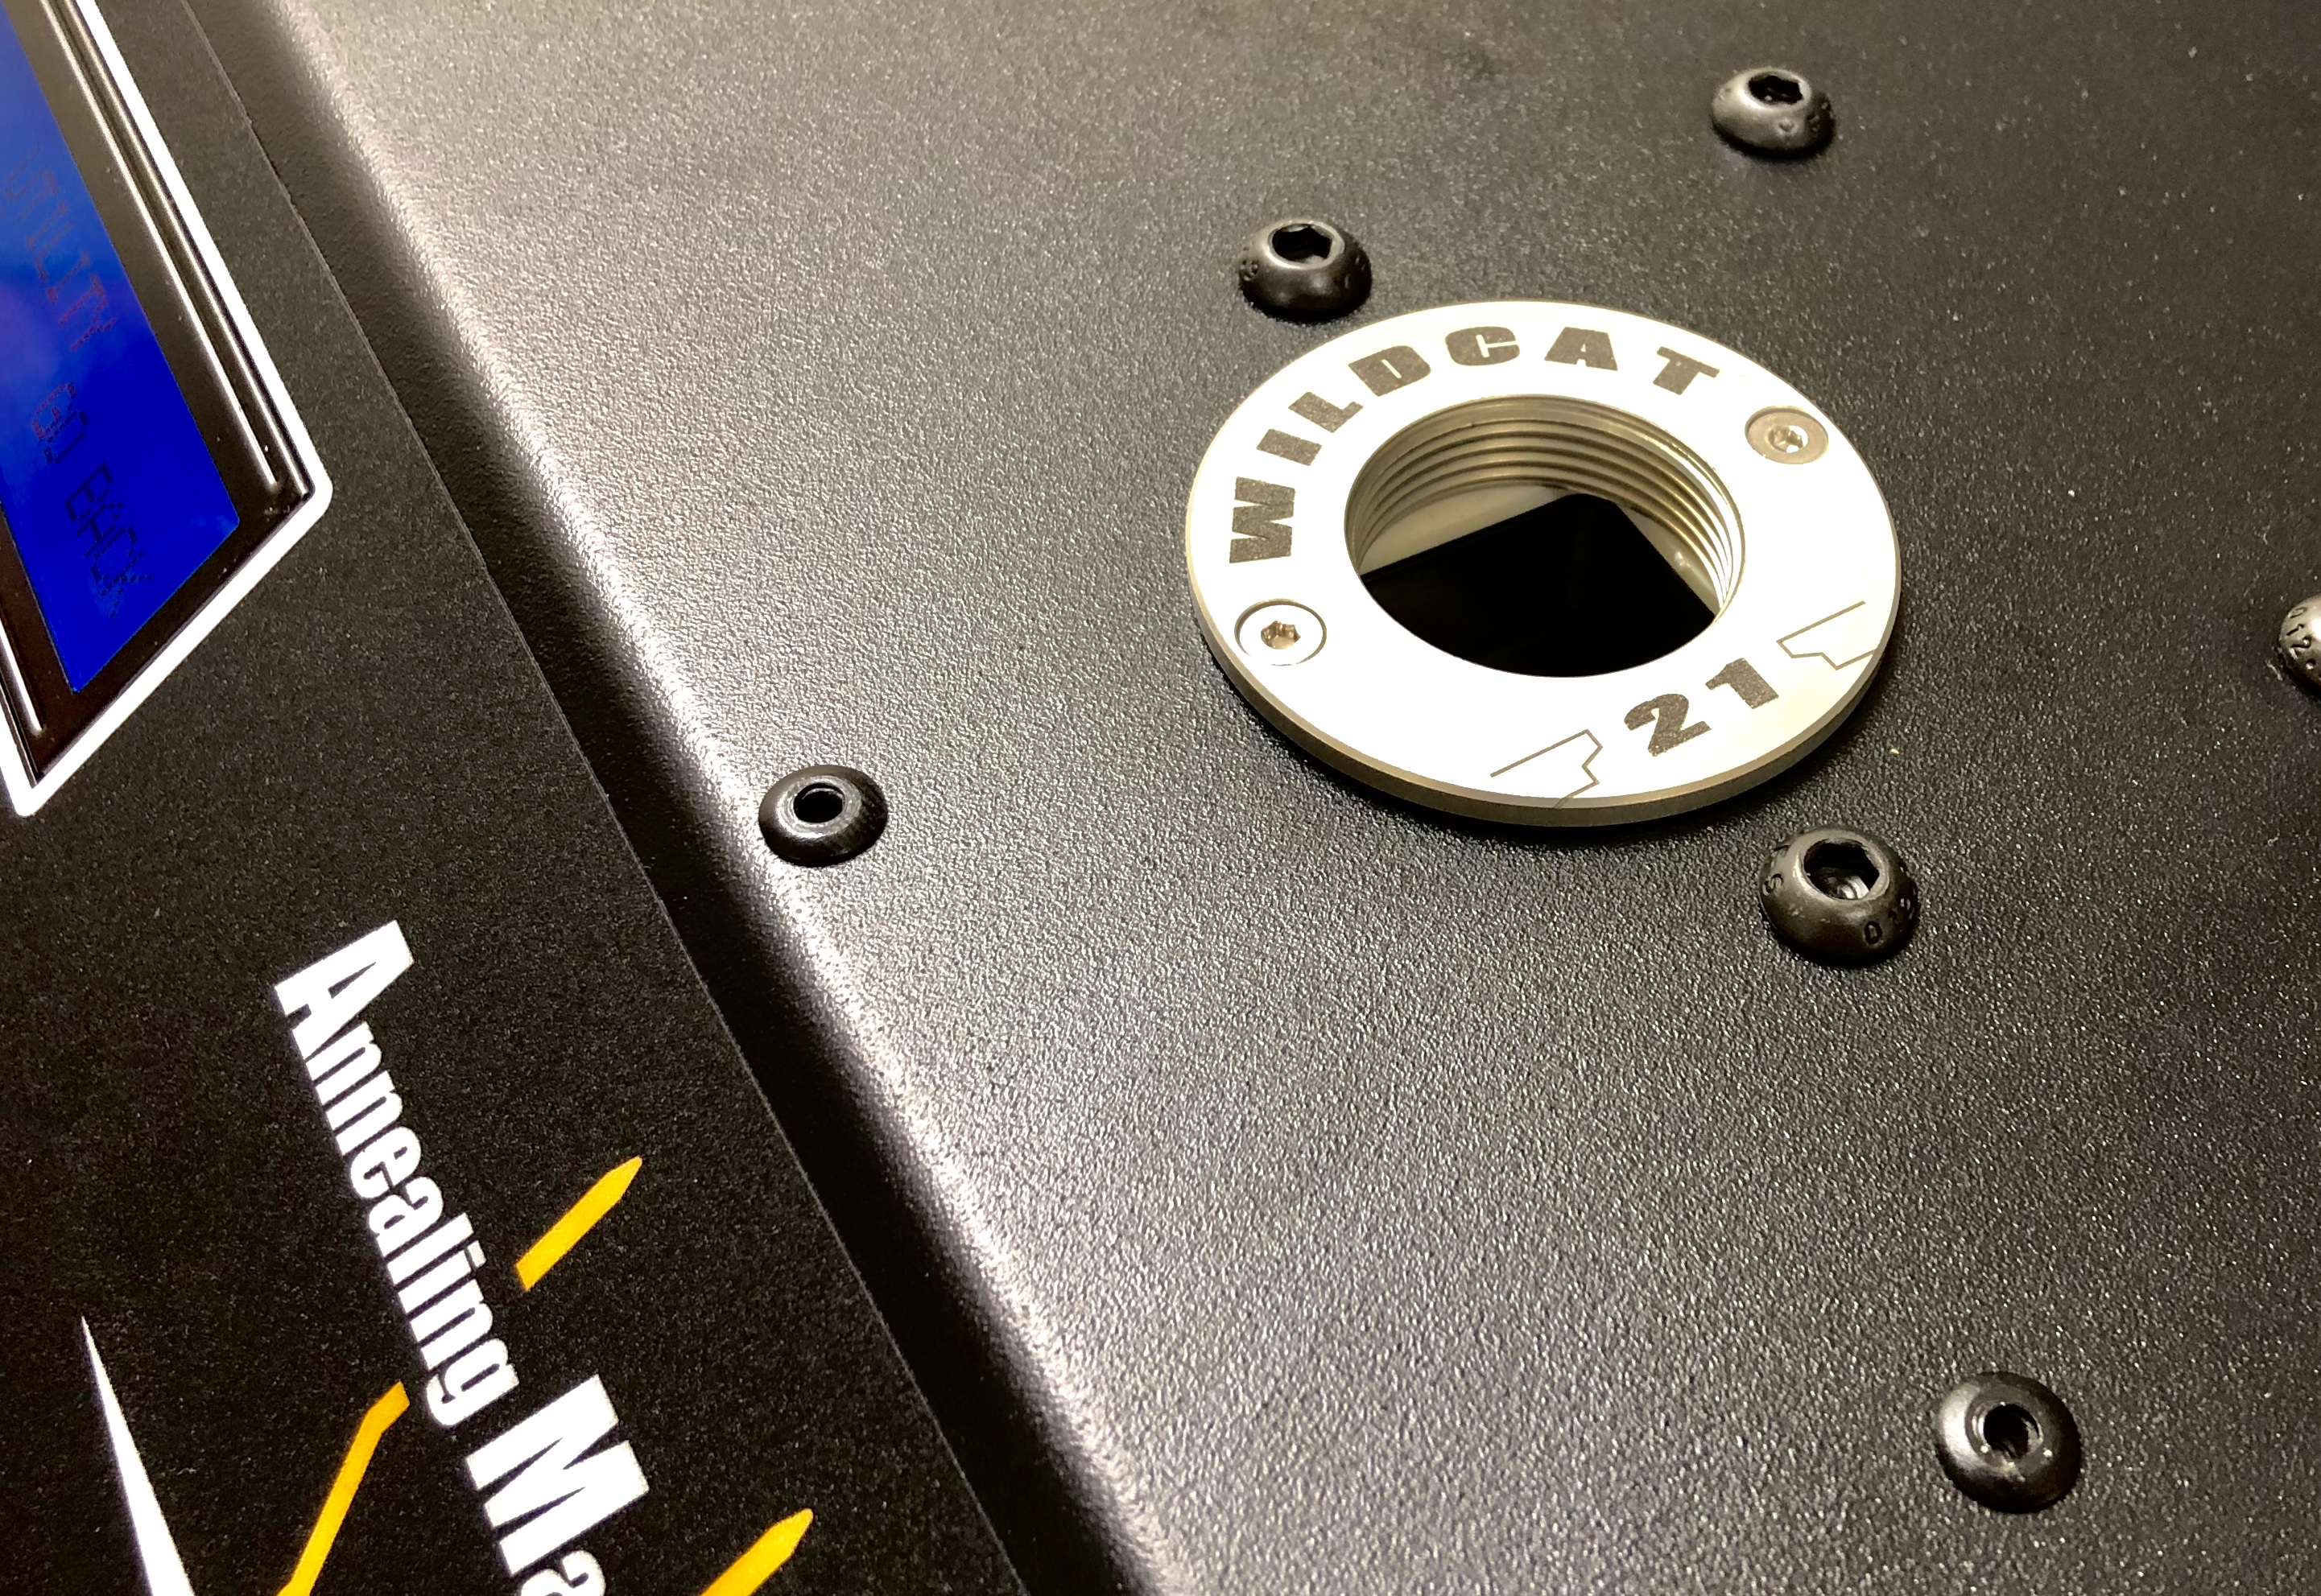
"Wildcat 21” inductor.
Our Mark ll annealer has an air gap of 19 mm in the inductor. This is ample for everything up to and including standard 50 BMG annealing. However, some of the 50 BMG based wildcats, including the 375 Hammer Head are also improved, meaning that the body is blown out beyond 19 mm at the shoulder. We have therefore developed a specific "made to order” Mark ll with a 21 mm air gap. It is identified with a distinctive "Wildcat 21” pilot boss. This will also be available as an upgrade for those wildcatters who need the extra capacity. Contact us for details.
We have also developed a range of custom pilots of varying heights to handle the various shortened 50 BMG wildcats.
SEQUENCE:
After considerable testing, we developed the following sequence, using Lake City 04 cases:
Stage 1.
We started by sacrificing a standard 50 BMG case in AZTEC mode using pilot #501. It yielded an annealing code of 2206. Because Stage 1 reforming is the most radical part of the process, we needed to add powerin order to apply sufficient heat to the case body well below the shoulder. As noted below, each subsequent stage also needed progressively deeper annealing. We therefore needed to swap to our 4000 series programs.
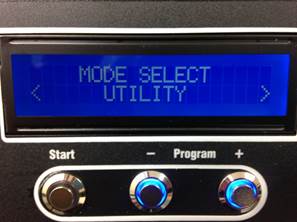
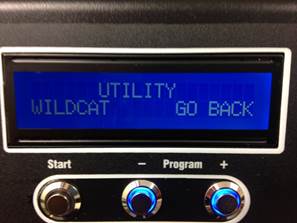
Our Mark ll 4000 series of AZTEC annealing codes were specifically designed for very heavy cases such as .416 Barrett. It is ideal for progressively adding more power as required for 50 BMG wildcatting. To convert the 2000 series 50 BMG codes to 4000 series for the use with wildcatting this case, we have added a "Utilities” option to the AZTEC menu. When this is selected, it displays "Wildcat”. That mode provides a code converter.
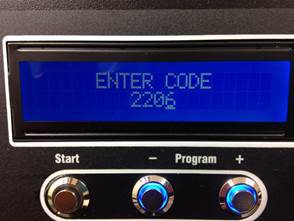
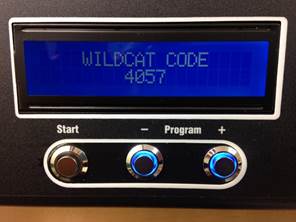
When the original 2000 series code is entered and "Start” is pressed, the corresponding 4000 series code is displayed. 4000 series increments are sequentially equal, making it simpler to calibrate the extra power requirements for each stage. The original code of 2206 converted to 4057. We then added 13 to give a first annealing code of 4070.After annealing, the case was thoroughly lubed and pressed into the stage one bushing in the forming die. It formed perfectly.
We then trimmed the case down to just over 3” (The finished case length of the 375 Hammer Head is 2.990”). This was so the new neck and shoulder could be inserted correctly into the inductor for the next annealing.
To Summarise the steps so far:
1.
ANALYSE one case to get the normal AZTEC annealing code.
2.
Convert that code to the 4000 series using the new utility function. (Because we need MORE heat in the body and shoulder area for the first major sizing pass)
3.
Add 13 to the resultant 4000 code.
4.
Anneal the first case to be sized with the new 4000 series code.
5.
Apply Lube and perform the first sizing operation.
6.
Trim the case to 3” length.
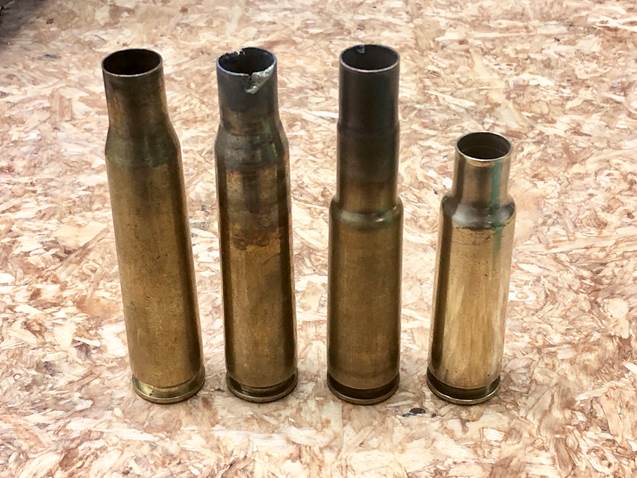
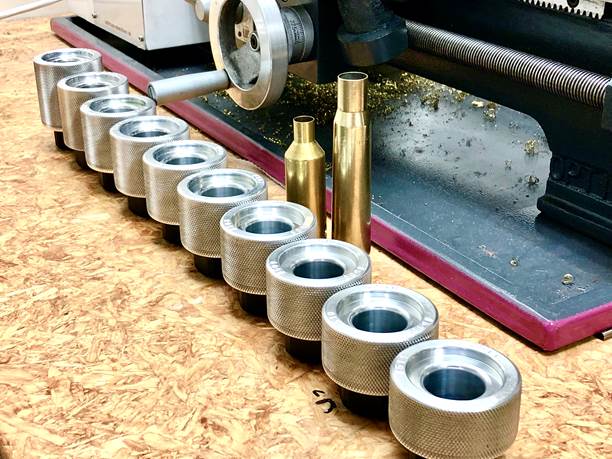
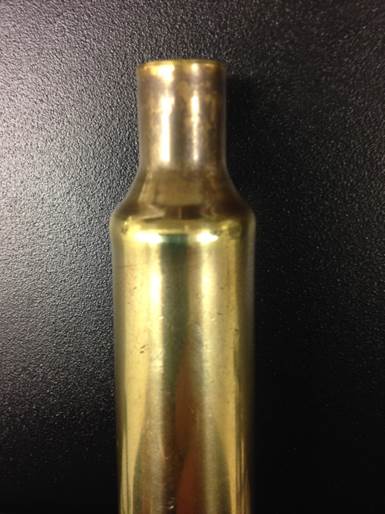
(L – R) Original 50 BMG; AZTEC sacrificial case; 1st sizing; Trimmed to 3”
Stage 2
Next, we swapped from the standard pilot #501 to the shorter #509, which is the correct height to anneal the neck and shoulder of the 375 Hammer Head.
The neck wall thickness of the original 50 BMG case averaged 0.020”. However, the newly formed and trimmed case neck wall was much thicker, averaging 0.028”. We therefore needed to add a further 9 increments to the Stage one code (4070 + 9 = 4079) The case was annealed on 4079, lubed and passed through the forming die with the stage 2 bushing. Again, the result was excellent.
Stages 3 and 4.
After Stage 1, which forms the new shoulder is completed, Stages 2, 3, and 4 are essentially necking down procedures. All our previous testing has shown that a necked down case requires more power to anneal correctly than the parent case i.e. a .270 W necked down from 30.06 will require a little more power to anneal than the 30.06 case. Similarly, a 35 Whelan necked up from the same 30.06 will require a little less power to anneal correctly.
This also proved to be true when forming Stages 3 and 4 of the 375 Hammer Head. The Stage 3 bushing required an additional 4 increments. The case was annealed using 4083. Forming was again excellent. The Stage 4 bushing required an additional 3 increments. Annealing the case on 4086 and sizing gave a case ready for reaming and turning.
The completed Stage 4 cases were then inside neck reamed to .375”, and turned to 0.020”. Because the neck wall was now reduced, we now needed to back the annealing off a little for the finished anneal. A setting of 4077 gave the correct neck annealed Vickers hardness.
Other brands
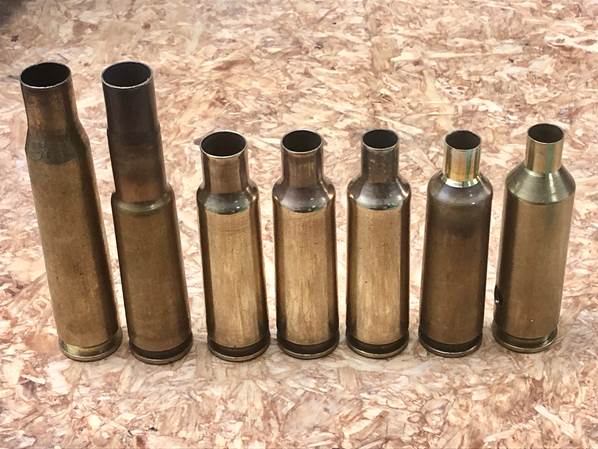
The next stage of testing was to compare the results of different brands and lots of 50 BMG brass. We tested Lake city 70, 81 and 04. We also tested IVI 05, WCC 07, and CBC .50. In Analyse mode, these unaltered cases generated basic 2000 series codes ranging from 2206 to 2295, which is a fairly large spread. When converted to 4000 series codes, the range was 4057 to 4082.
Next, we ran samples of each brand/lot through the Stages 1 – 4 reforming processes, testing Vickers neck hardness after annealing at each stage and also correct forming in the sizing die. We found that regardless of the starting code (4057 to 4082), that the same incremental increases for each stage worked for each brand/lot. The first anneal of the standard 50 BMG cases always requires +13 units added to the 4000 series code. The second anneal of the shortened cases always requires a further +9 units added to the previous code. The third anneal always requires a further +4 units added, and the fourth anneal requires a further +3 units added.
This progression was correct for all brands tested:
1.
AZTEC Analyse original 50 BMG case using pilot #501 and pilot code 501 A. This gives a 2000 series code
2.
Convert the code to 4000 series, using the code converter "Wildcat” function.
3.
Add 13 to the 4000 code.
4.
Anneal 50 BMG cases.
5.
Lube and size in Stage 1 bushing die.
6.
Trim to length.
7.
Swap to correct pilot for shortened cases (#509 for 375 Hammer Head).
8.
Add 9 to last used 4000 series code and anneal cases.
9.
Lube and size, using Stage 2 bushing.
10.
Add 4 to last used 4000 series code and anneal cases.
11.
Lube and size, using Stage 3 bushing.
12.
Add 3 to last used 4000 series code and anneal cases.
13.
Lube and size using Stage 4 bushing.
14.
Ream inside necks and turn to 0.020” neck walls.
15.
Anneal using 4077.
16.
Full length size.
The cases are now ready for fire forming.
Summary
Once the above sequence was established, we were able to easily reform any 50 BMG cases to 375 Hammer Head, using just a standard Hornady 50 BMG press. We did not require any extra leverage or power. Furthermore, we had zero case failure. Not one case split during the reforming stages. While these results are specific to the 375 Hammer Head, we believe they will also be good for similar wildcats. Developers are welcome to send dies for us to test.
As a final test, we asked Metlab to section a finished case which had been reamed, neck turned, annealed and full length sized. These are the results.
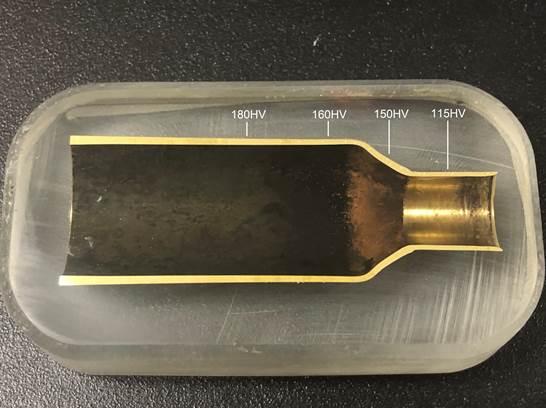
This shows ideal hardness in the neck, shoulder and body. The cases are completely ready for fire forming and use. We do recommend that any other variations of this wildcat should be designed with 0.020” turned necks. When annealed every reload, as recommended, the correct annealing setting will also anneal the shoulder correctly. If necks are turned thinner, less heat can be applied to the shoulder.
Compared to forming the 375 Hammer Head, most other forms of wildcatting are much easier. Many can be accomplished just using the one standard pilot and one or two settings ascertained by AZTEC analysis.
Extreme wildcatting – with Annealing Made Perfect
"It isn’t that hard”
Additional notes:
Our first attempts at stages 2 to 4 forming did not produce consistent results. We started by using the same annealing setting as Stage 1. That resulted in a progressively larger bulging at the shoulder.
Shoulder bulge
Hardness testing revealed that the necks were being under-annealed. This stands to reason, because the neck wall thickness of the original 50 BMG was av. 0.020”, whereas the neck wall of the shortened cases was av. 0.028”. When the too-hard necks were pressed into the forming die, excessive force was applied to the shoulder, causing the bulge. Increasing the annealing setting so that the necks were annealed to 100 HV at each stage solved the problem.