How to install AZTEC MODE
Note: The AZTEC installation and unlock process requires an unregulated internet connection to our server. Attempting to unlock AZTEC while on a corporate network or secure internet service may cause issues. If this applies to you, connecting via a mobile hot spot or ensuring that PORT 1509 is open on your network should solve this issue.
Clicking "SERVER TEST" on your Update software will test your connection.
For how to install on Mac, view the video below. For PC view Step 1 below the video.
There is a short HOW TO video for PC at the bottom of this page.
Step 1.
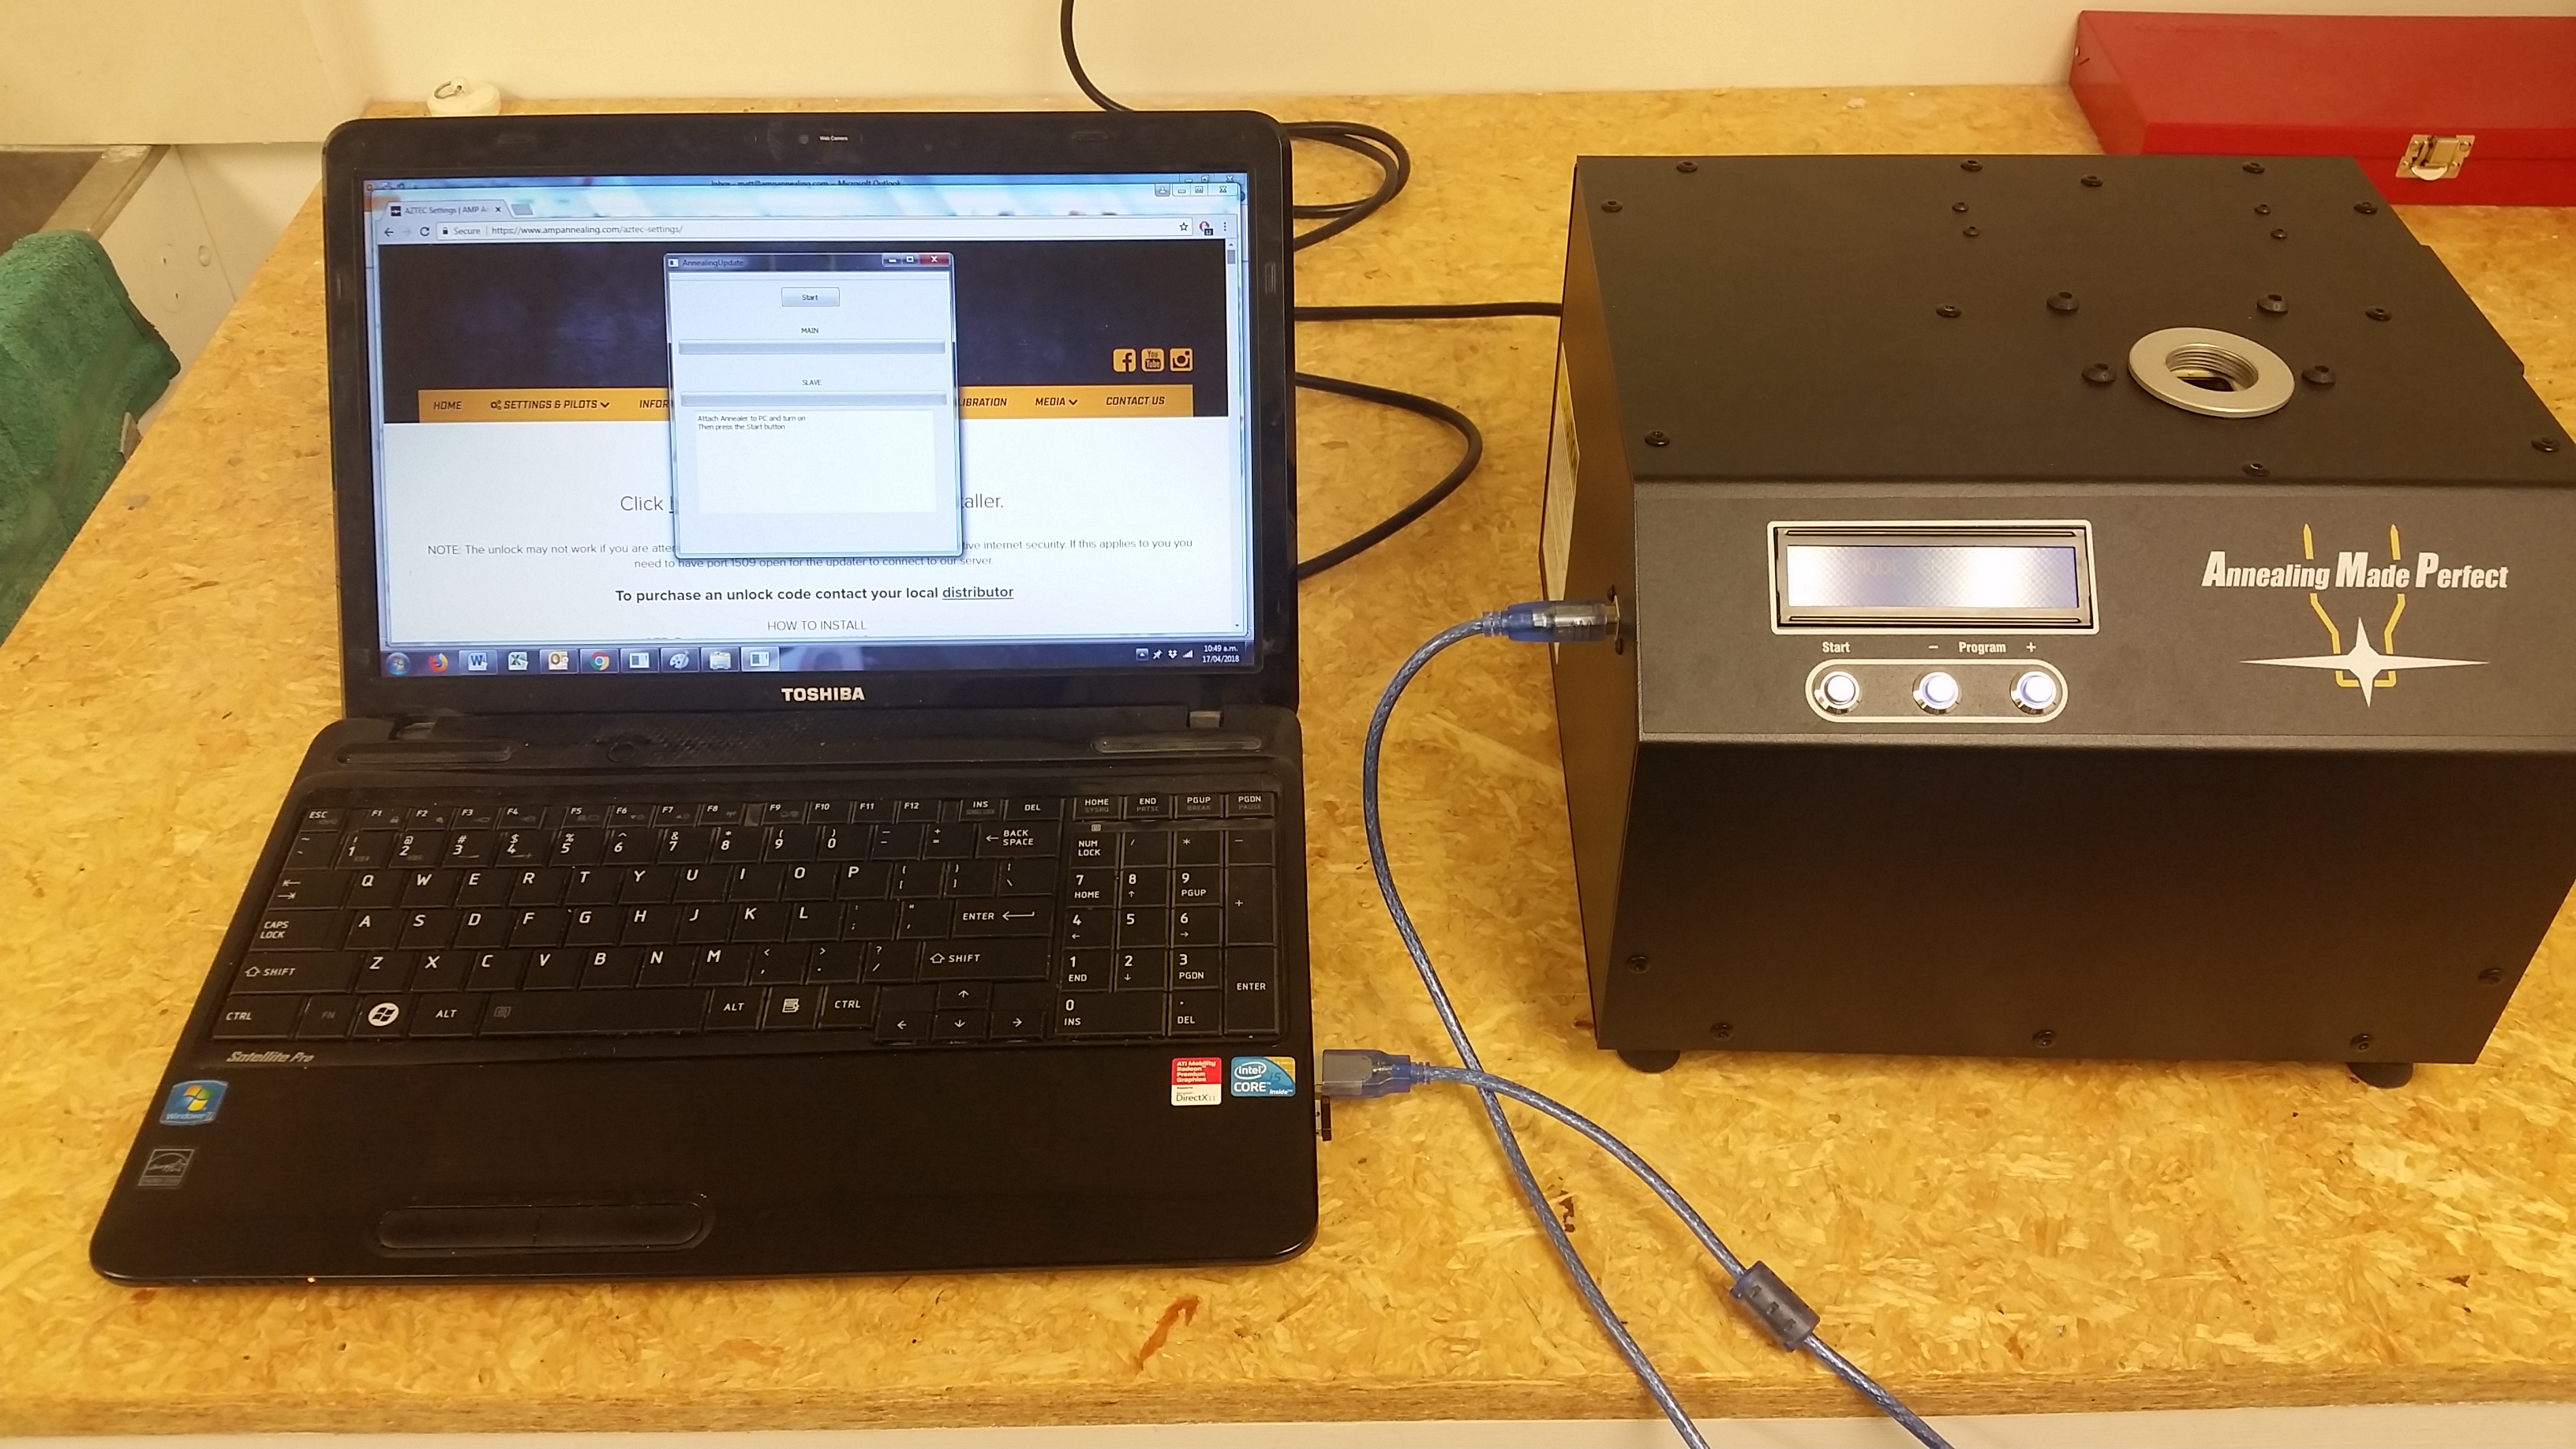
Connect your AMP annealer to your PC via the USB cable which was supplied with your AMP. Ensure that your annealer is turned on and that the PC is connected to the internet.
Your PC should automatically detect the annealer and download and install the drivers to communicate with it. This can take several minutes. When this is done you should see this message at the bottom right of your screen:
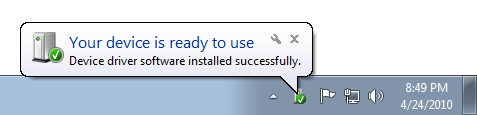
This only occurs the first time you connect your annealer to a PC and won’t happen again if using the same PC for future connections.
NOTE: If these drivers fail to download you can manually install them by running the program from this link: DRIVERS
Step 2.
Download the Software Installer from our website from the Downloads page
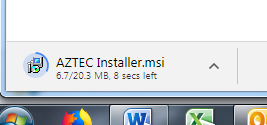
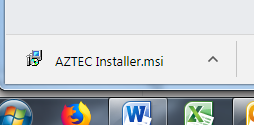
The AZTEC Installer.msi program (Sometimes seen as Annealer Update.msi) should now be in your Downloads folder.
STEP 3.
Run the Installer program to install the Update software to your PC as shown below:
(Windows may warn you that the program is not safe, just ignore this and run it anyway.)
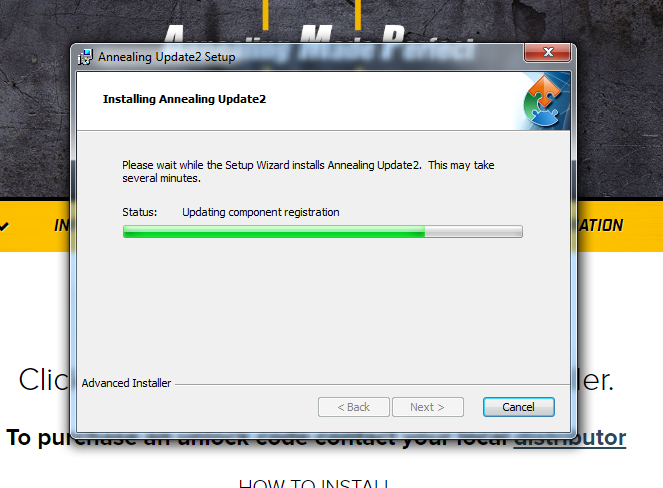
Follow the prompts and click ‘Finish’ when completed.
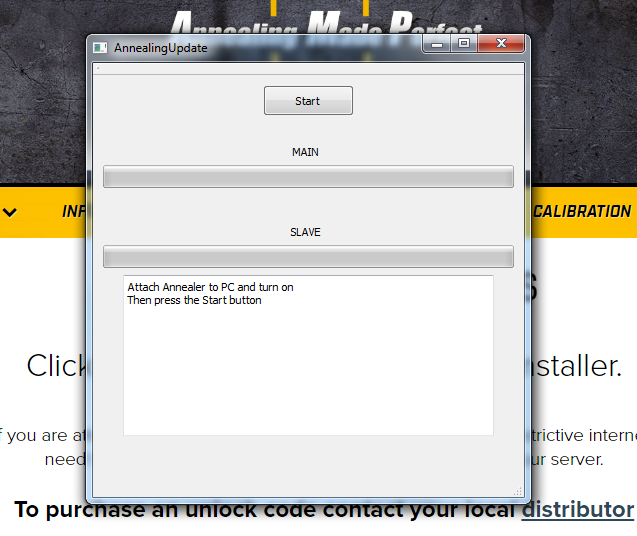
STEP 4.
The AMP Annealing logo will now be visible on your desktop as an icon. Open this program and click "Check for updates" to automatically download all the latest files for your annealer.
Once this is done clicking on "Update annealer" will show the window below:
Step 5.
With the Annealer turned on and connected to your PC, click on the "Start” button at the top of the Update program. You should see a "Connected” message as shown below. This can take a minute to show.

If "Failed to connect” is shown instead refer to the manual driver download as explained in Step 1.
Alternatively the drivers can be downloaded by following the prompt on the Updater
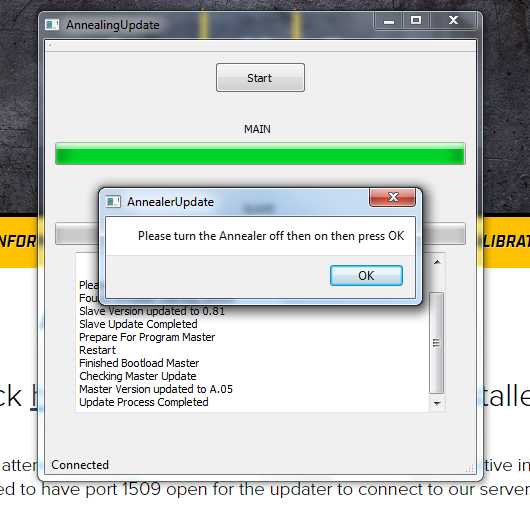
At this point the Update program will update the SLAVE portion of the update followed by the MAIN. The SLAVE can take up to seven minutes to complete, the main takes roughly one minute.
NOTE: Sometimes the Updater can go unresponsive after installing either the SLAVE or MAIN. Simply restart the Updater if this occurs and it will start from where it left off.
When both the SLAVE and MAIN have finished downloading, it will display this message:
Step 6.
After clicking "OK” the Updater will ask if you wish to enter a code as shown:
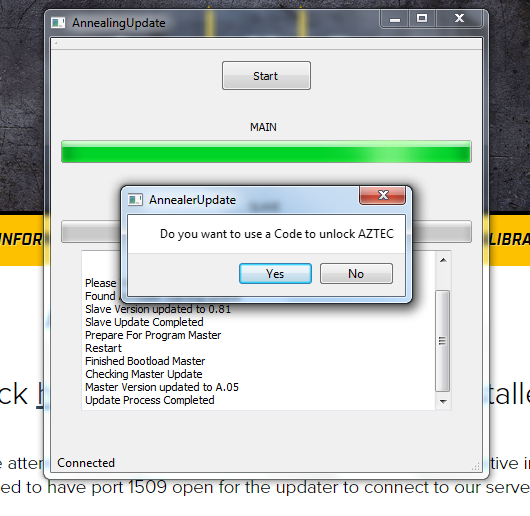
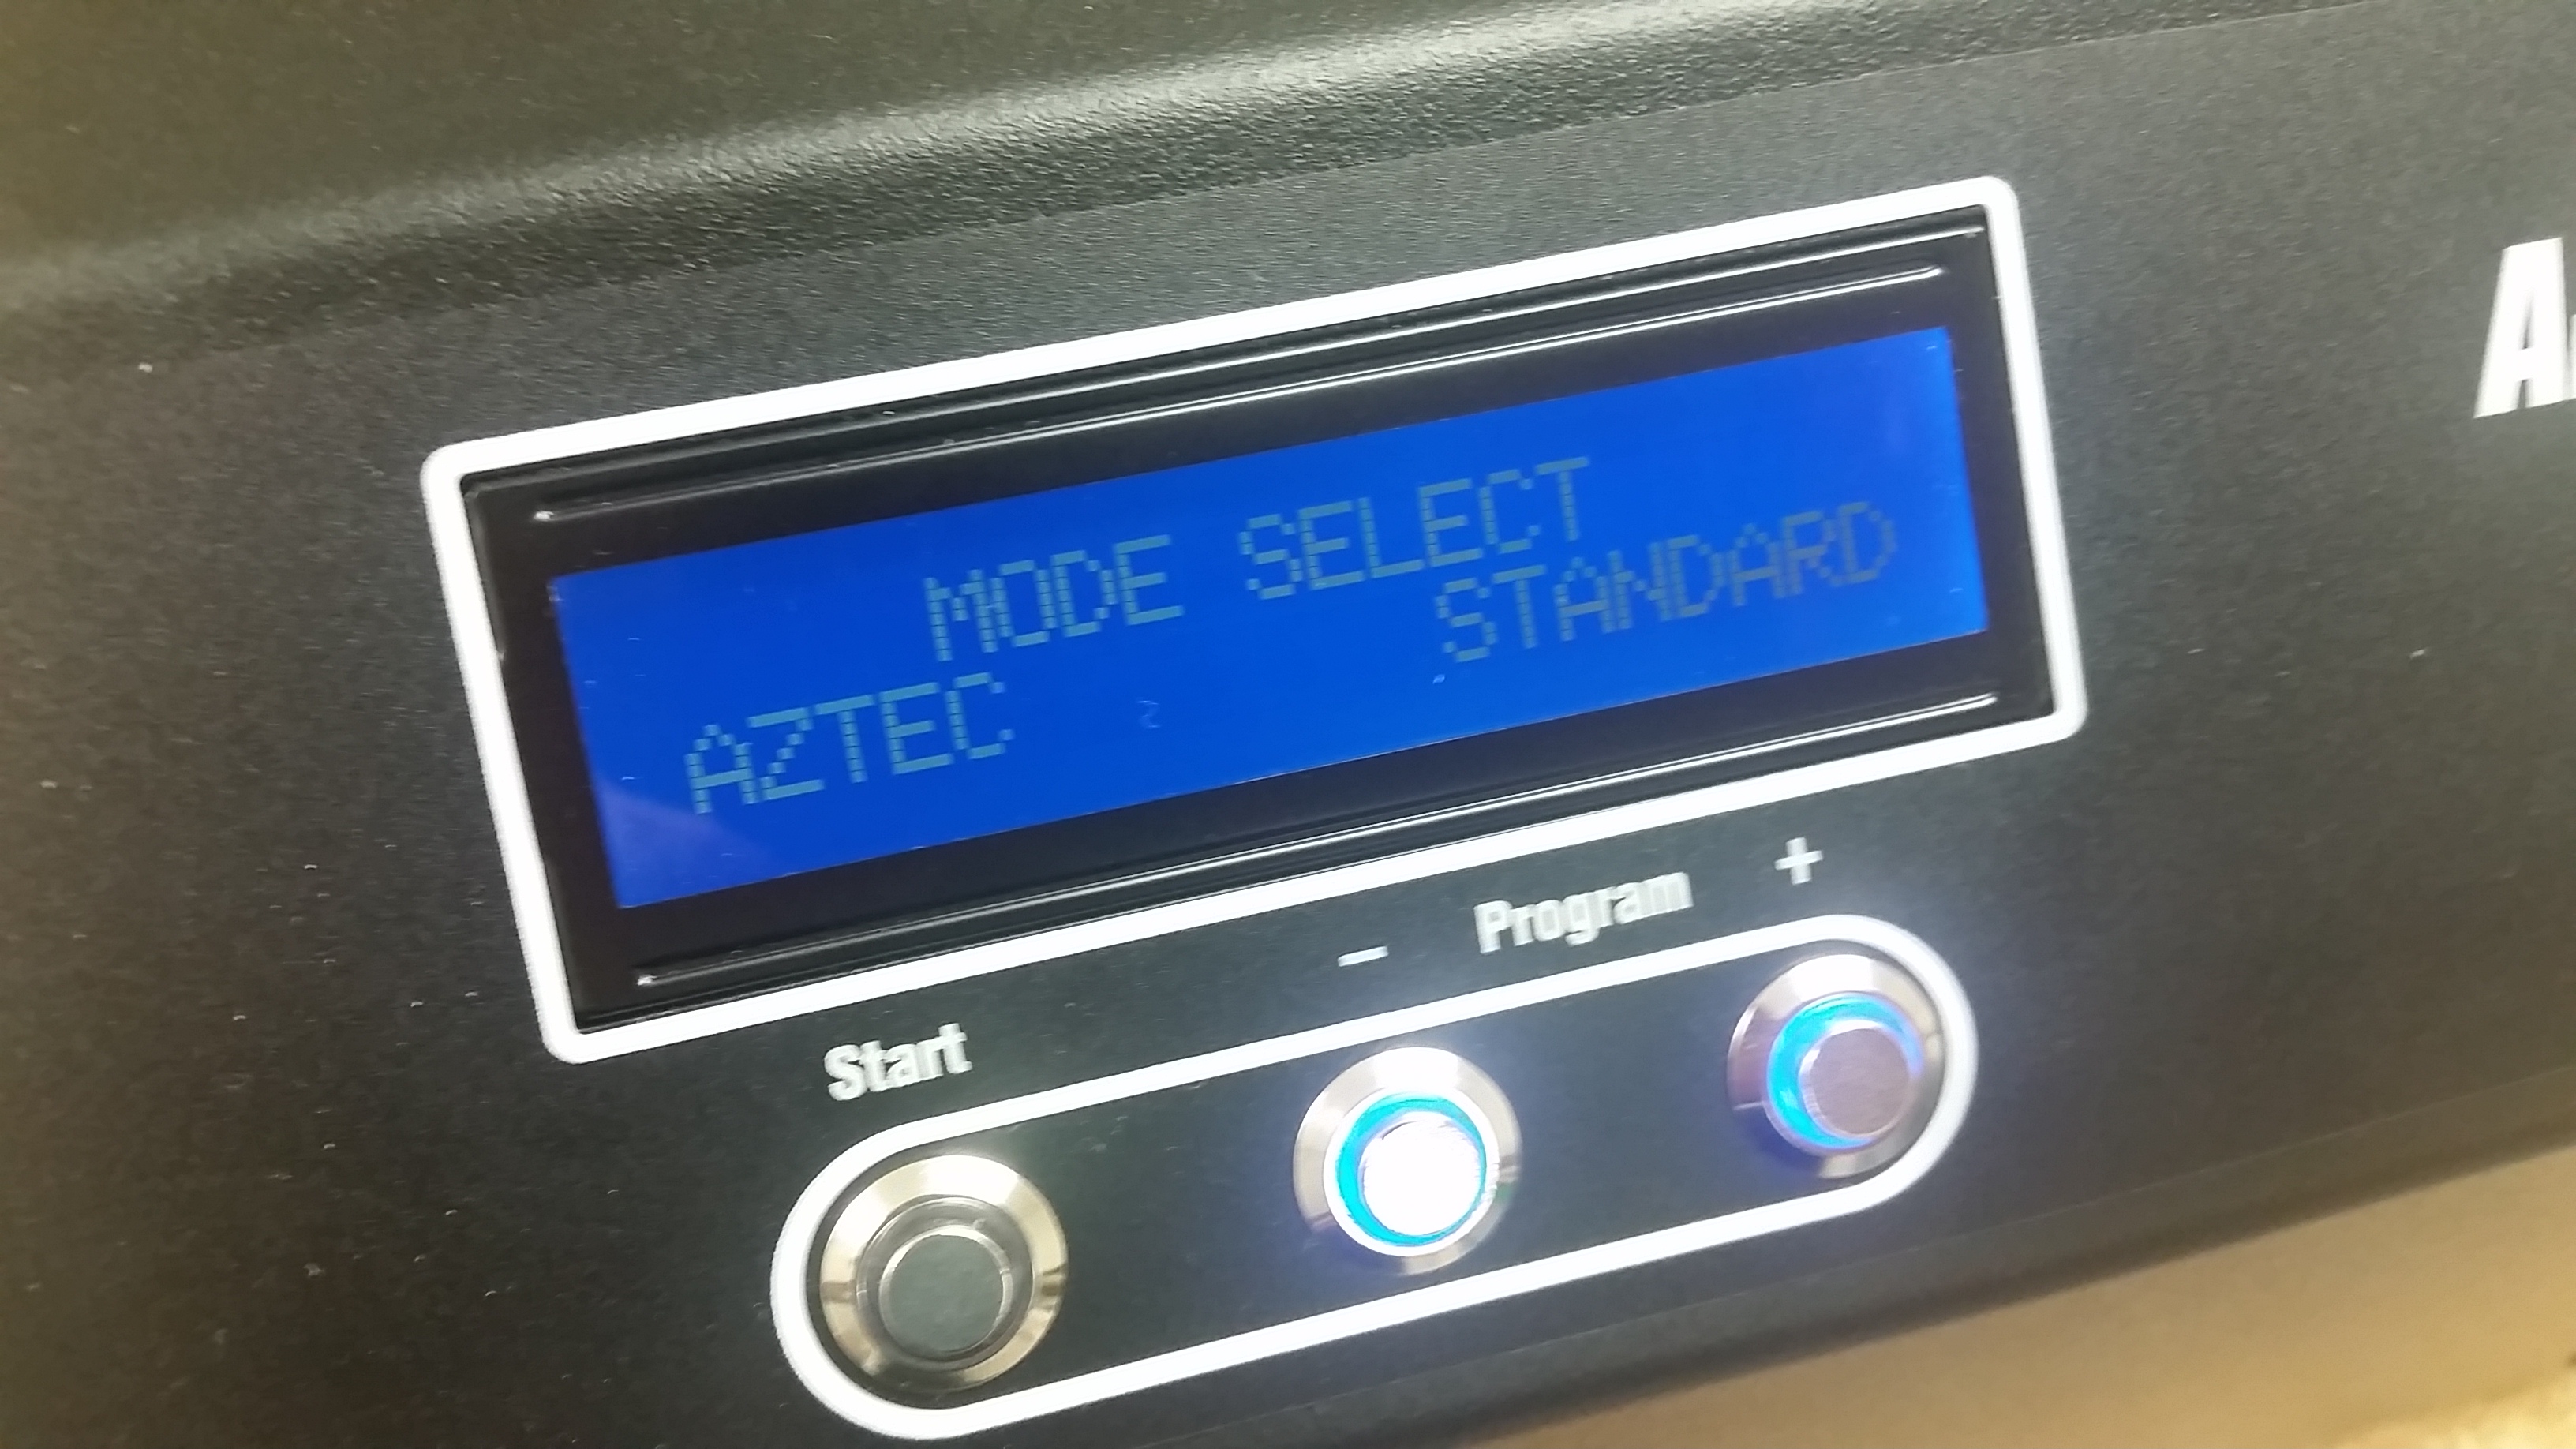
If you have a code to enter click "Yes". If you are only Installing AZTEC and wish to purchase an update later pressing "NO” will finish the install process and AZTEC will remain LOCKED with the STANDARD mode being available for selection as shown:
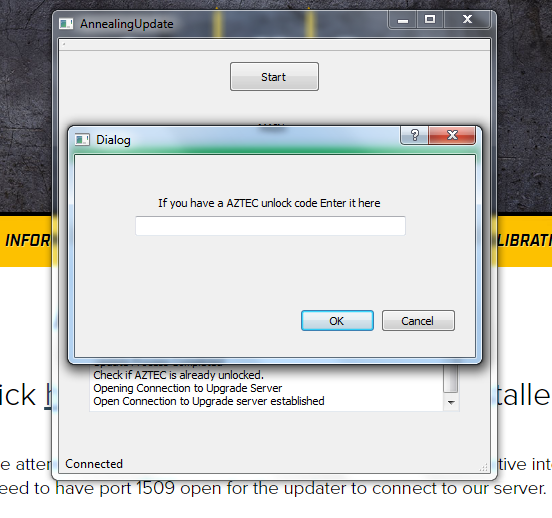
If you have clicked "Yes”, enter your code in the box shown below, Be sure your PC has access to the internet and make sure it is not restricted as noted above Stage 1.
When AZTEC has been successfully unlocked this message will appear at the bottom of your Update program which completes the install:
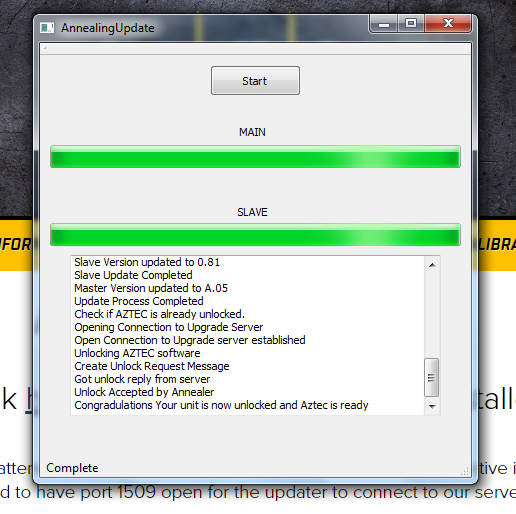
Congratulations!!!
We made a quick video explaining the install process below. We apologize for the lack of quality as it was rushed and we will replace it with a more professional version soon.